As a crocheter, I should have known someone would eventually ask me for one of these.
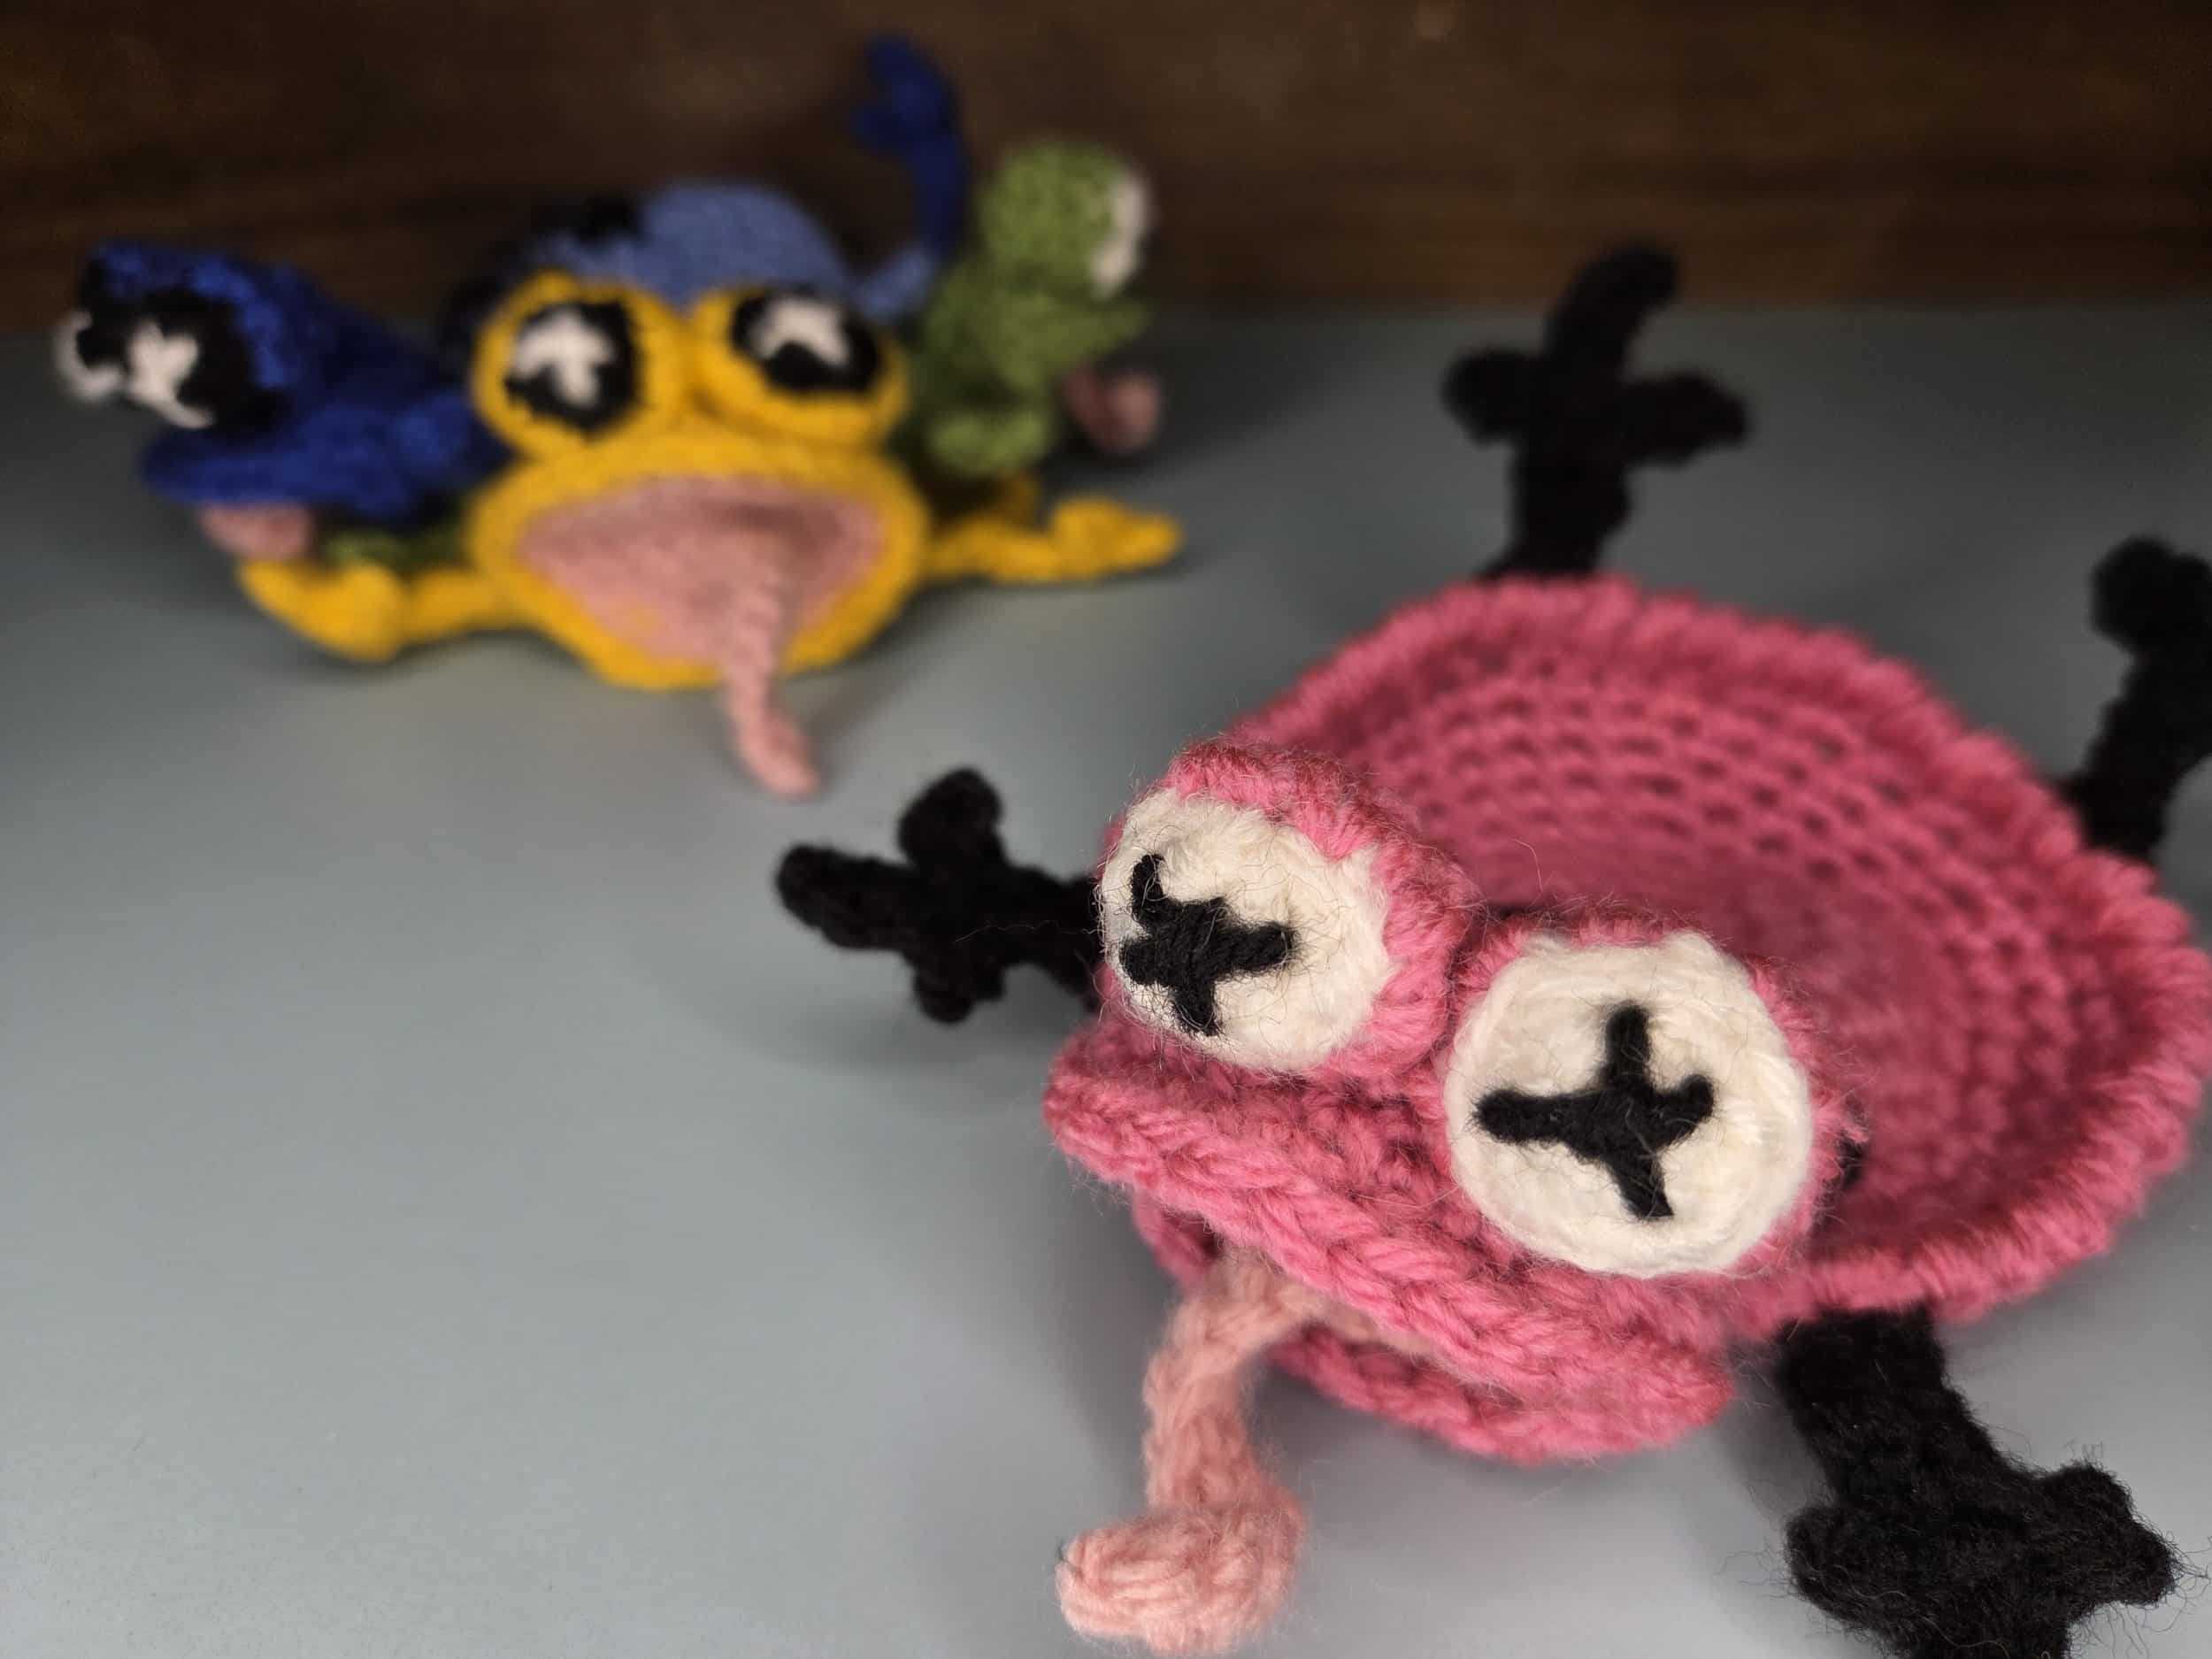
I've seen pop coasters everywhere, and honestly, I've been waiting for my excuse to make one. My request was simple: any animal. But it had to have a tongue.
The only right answer was a frog.
Difficulty:
Advanced Beginner
Gauge:
The body of the frog measures 4 inches
Yarn Usage:
- Body, Legs, Eyelids yarn approximately 18 grams
- Front (circle where "x" pupil will be sewn) of eyes approximately 1 gram
- Pink for mouth and tongue approximately 2 grams
- Scrap yarn for “X” pupils
Pattern Notes:
Repeats are placed in (). Stitch counts are in [ ].
Any medium-weight acrylic yarn works well here. I used a variety of colors to make a set.
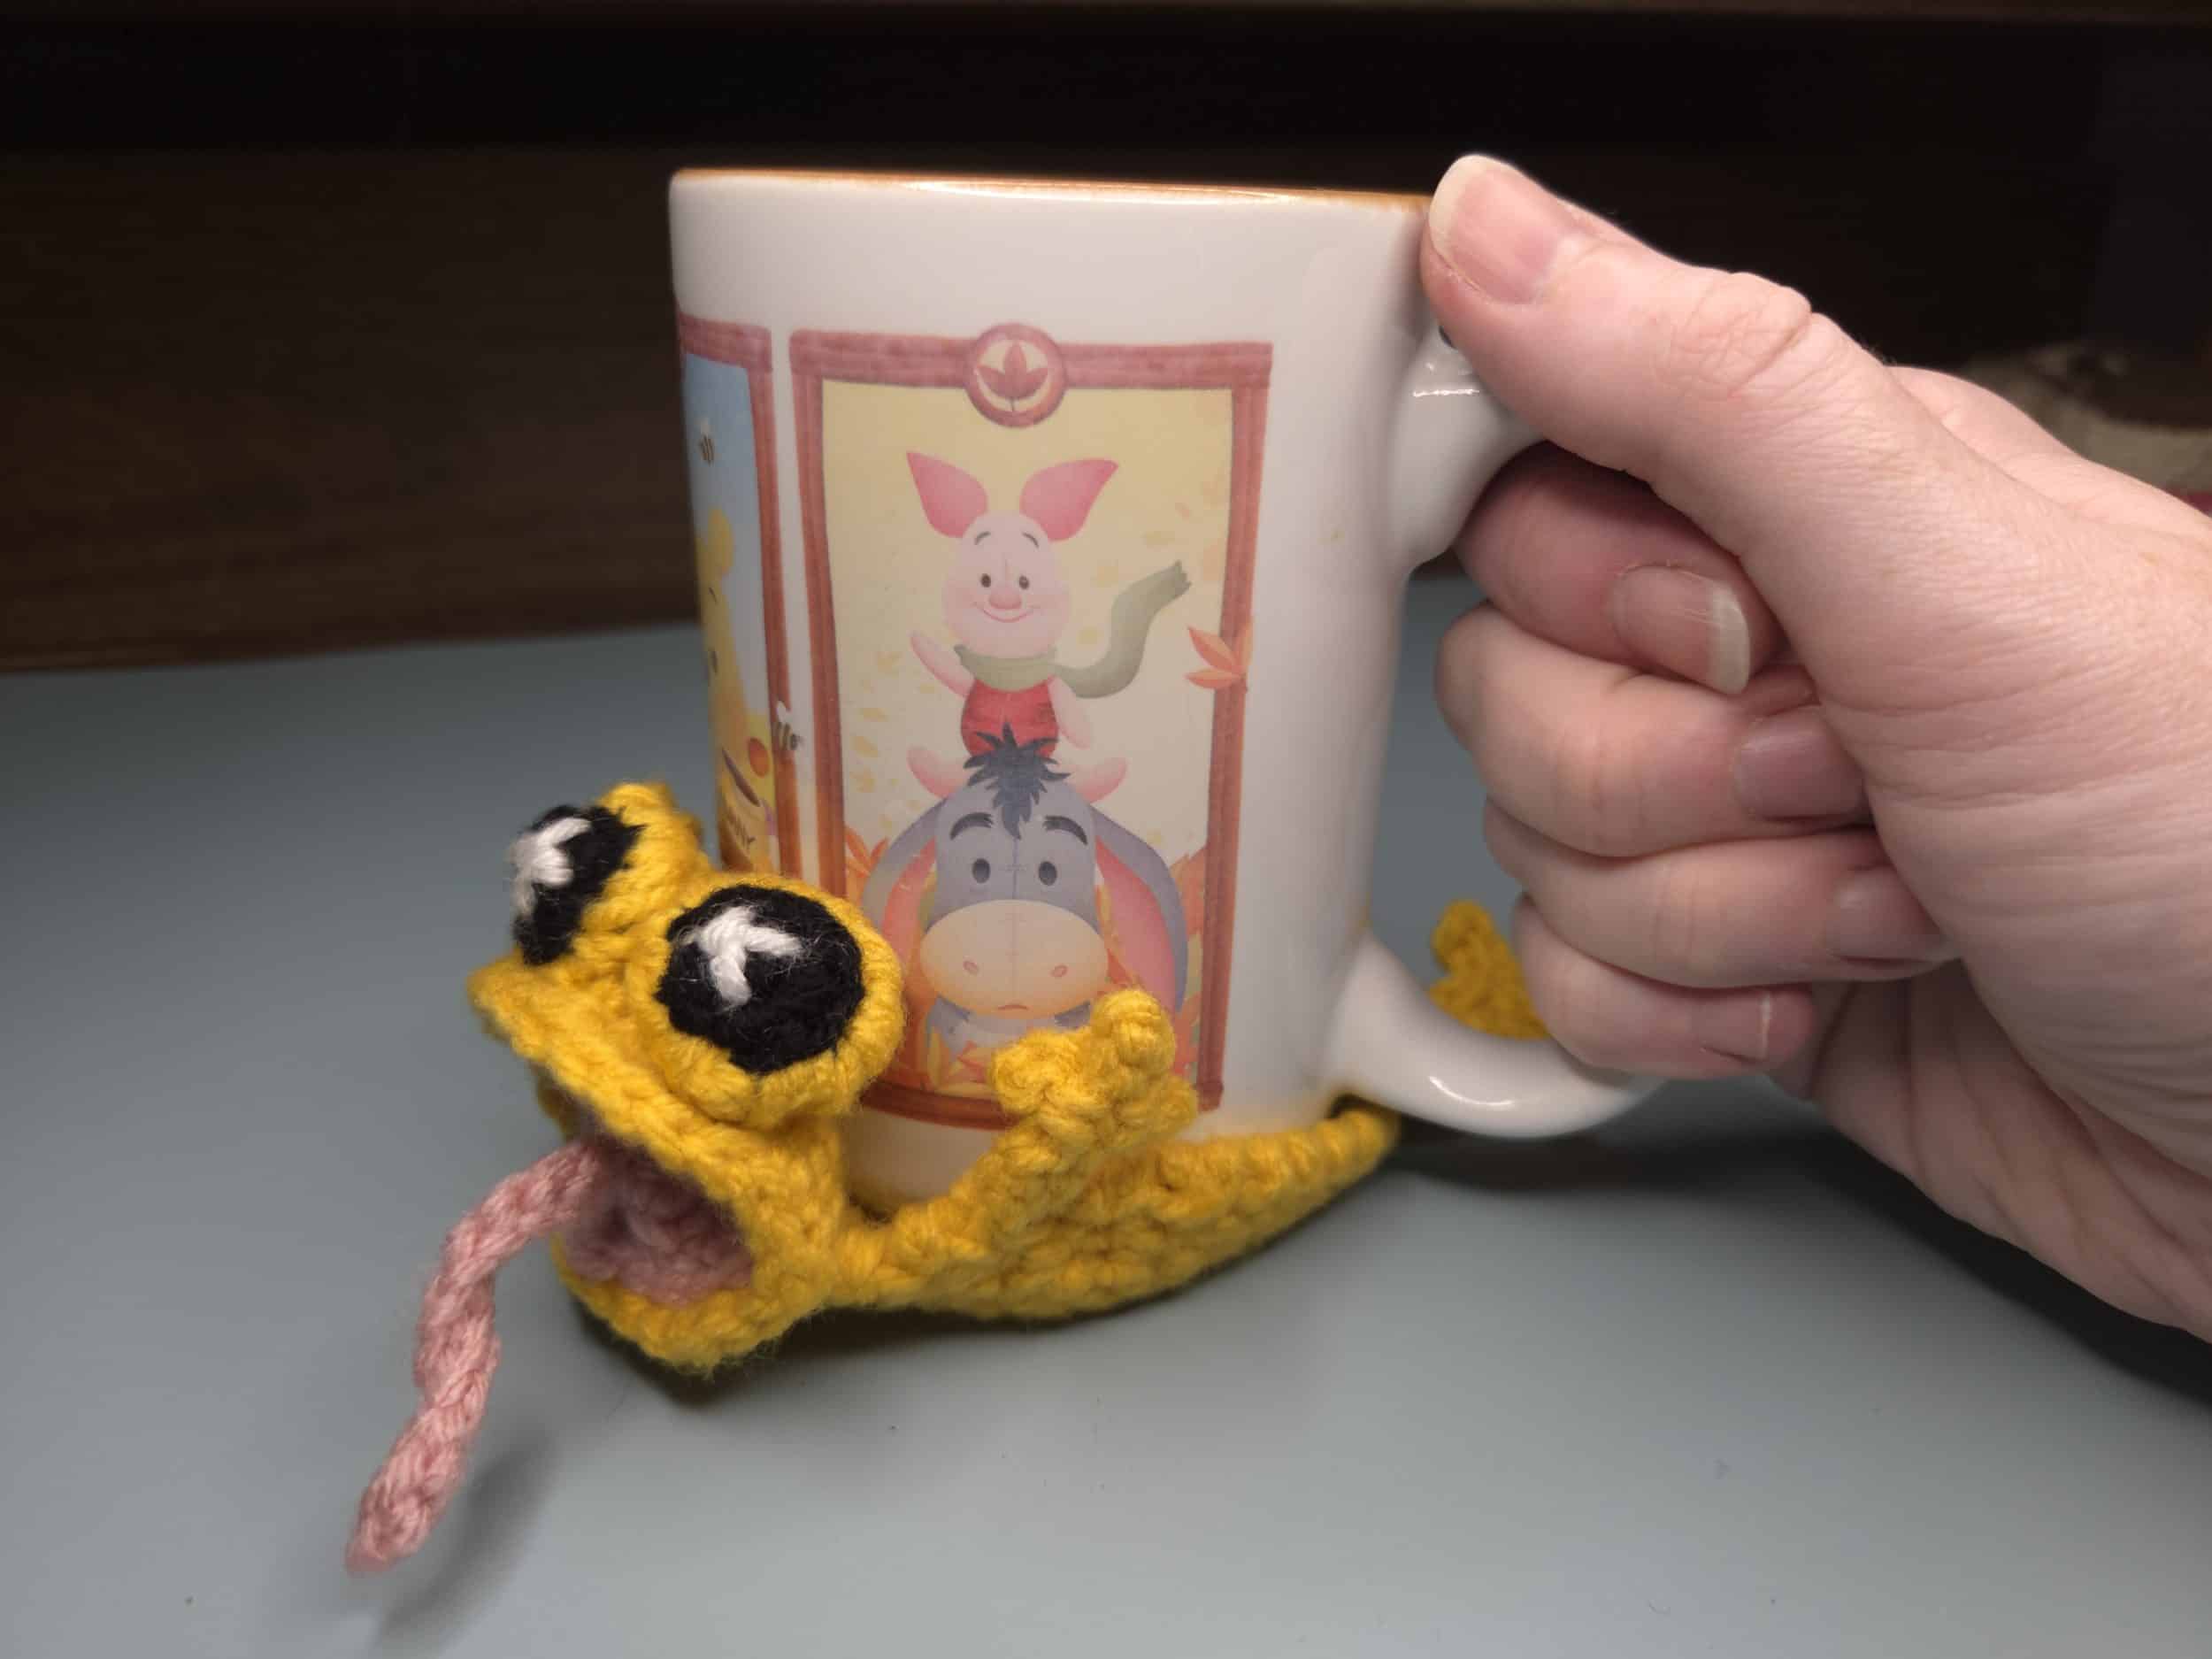
When working the body (coaster base), it should hold a coffee mug comfortably
I used the tails to "fill" the eyes and head where needed to make them more plushie. If you want to add extra filling, polyfill would work great.
This coaster is worked in parts and sewn together. My embroidery was a bit of a "winging it" situation. I've included notes where I could, but this is one of those patterns where your personality gets to show up in the details.
This pattern came to life when I found out my younger sister was moving into a new place. New places need crocheted goodness, obviously. But this is my younger sister. There is not much grandma crochet happening there. No cute hdc hand towels or bee hot pads. She wanted something squishy with its tongue out.
A frog seemed pretty fitting. So I played around and found my own pattern to fit these viral trends my sister kept requesting.
What I loved most about this project is how different each frog can be. The body color, the eye color, the embroidery on the back. Every frog becomes its own little character. This project made me smile the whole way through, and I hope it makes my sister smile every single time she has to set her coffee down.
The power of a smile is so important, and what a great gift to give as she settles into her new space. Thich Nhat Hanh writes about the power of smiling in his book Being Peace(opens in new tab). He speaks about the importance of being aware of our whole body, our feelings, our minds, and the world around us. Every day there is suffering in the world. But every day the sun also rises, flowers bloom, and our life in this moment is a miracle. Life is both dreadfully hard and outrageously beautiful. To practice mindfulness well, he teaches, we must hold both sides. And we must smile. A lot.
I hope you choose to smile with me while you make this silly little frog.
If you want to keep playing with yarn and bringing a little more calm to your hook, feel free to browse around my free patterns page. I'm always adding new designs there, and every single one comes with its own little mindful exercise to help you slow down while you create.
Hey, I’m Abby!
The hands and heart behind Yarnful Mind. I’m a stay-at-home mom, wife, and longtime lover of yarn. I turn to crochet not just for creativity, but for calm. What started as a way to quiet my depressingly anxious mind has grown into something much bigger: a gentle space where I can share patterns, mindful moments, and the slow magic of making.
Stitch slow, breathe deep, stay mindful.
Mindful Smiling
While working the body, choose a round where your mind is not focused on counting, round 1, round 10, or anywhere. Turn your attention to your breath.
As you breathe in, smile. As you breathe out, release.
Silently repeat to yourself:
"As I breathe in, I smile."
"As I breathe out, I release my stress."
Stitches (US Terms):
- ch = chain
- sl st = slip stitch
- sc = single crochet
- reverse sc = reverse single crochet (crab stitch)
- rnd = round
- st(s) = stitch(es)
- inc = single crochet increase (2 sc in same st)
Pattern
Body (Coaster Base)
The body increases are worked unevenly to create a concave shape that allows the coaster to pop and hold a mug.
MR: 8 sc [8 sts]
Rnd 1: sc inc in all [16 sts]
Rnd 2: (3 sc, sc inc) repeat 4 times [20 sts]
Rnd 3: (4 sc, sc inc) repeat 4 times [24 sts]
Rnd 4: (6 sc, sc inc) repeat 3 times, 3 sc [27 sts]
Rnd 5: (7 sc, sc inc) repeat 3 times, 3 sc [30 sts]
Rnd 6: (8 sc, sc inc) repeat 3 times, 3 sc [33 sts]
Rnd 7: (9 sc, sc inc) repeat 3 times, 3 sc [36 sts]
Rnd 8: (7 sc, sc inc) repeat 4 times, 4 sc [40 sts]
Rnd 9: (6 sc, sc inc) repeat 5 times, 5 sc [45 sts]
Rnd 10: Ch 1, reverse sc in each st around [45 sts]
Fasten off, weave in ends
Head
MR: 6 sc [6 sts]
Rnd 1: Inc in all [12 sts]
Rnd 2: (2 sc, inc) repeat 4 times [16 sts]
Rnd 3: (3 sc, inc) repeat 4 times [20 sts]
Rnd 4: (4 sc, inc) repeat 4 times [24 sts]
Rnd 5: (7 sc, inc) repeat 3 times. Sl st to 1st st of round [27 sts]
Fasten off, leave a long tail for sewing.
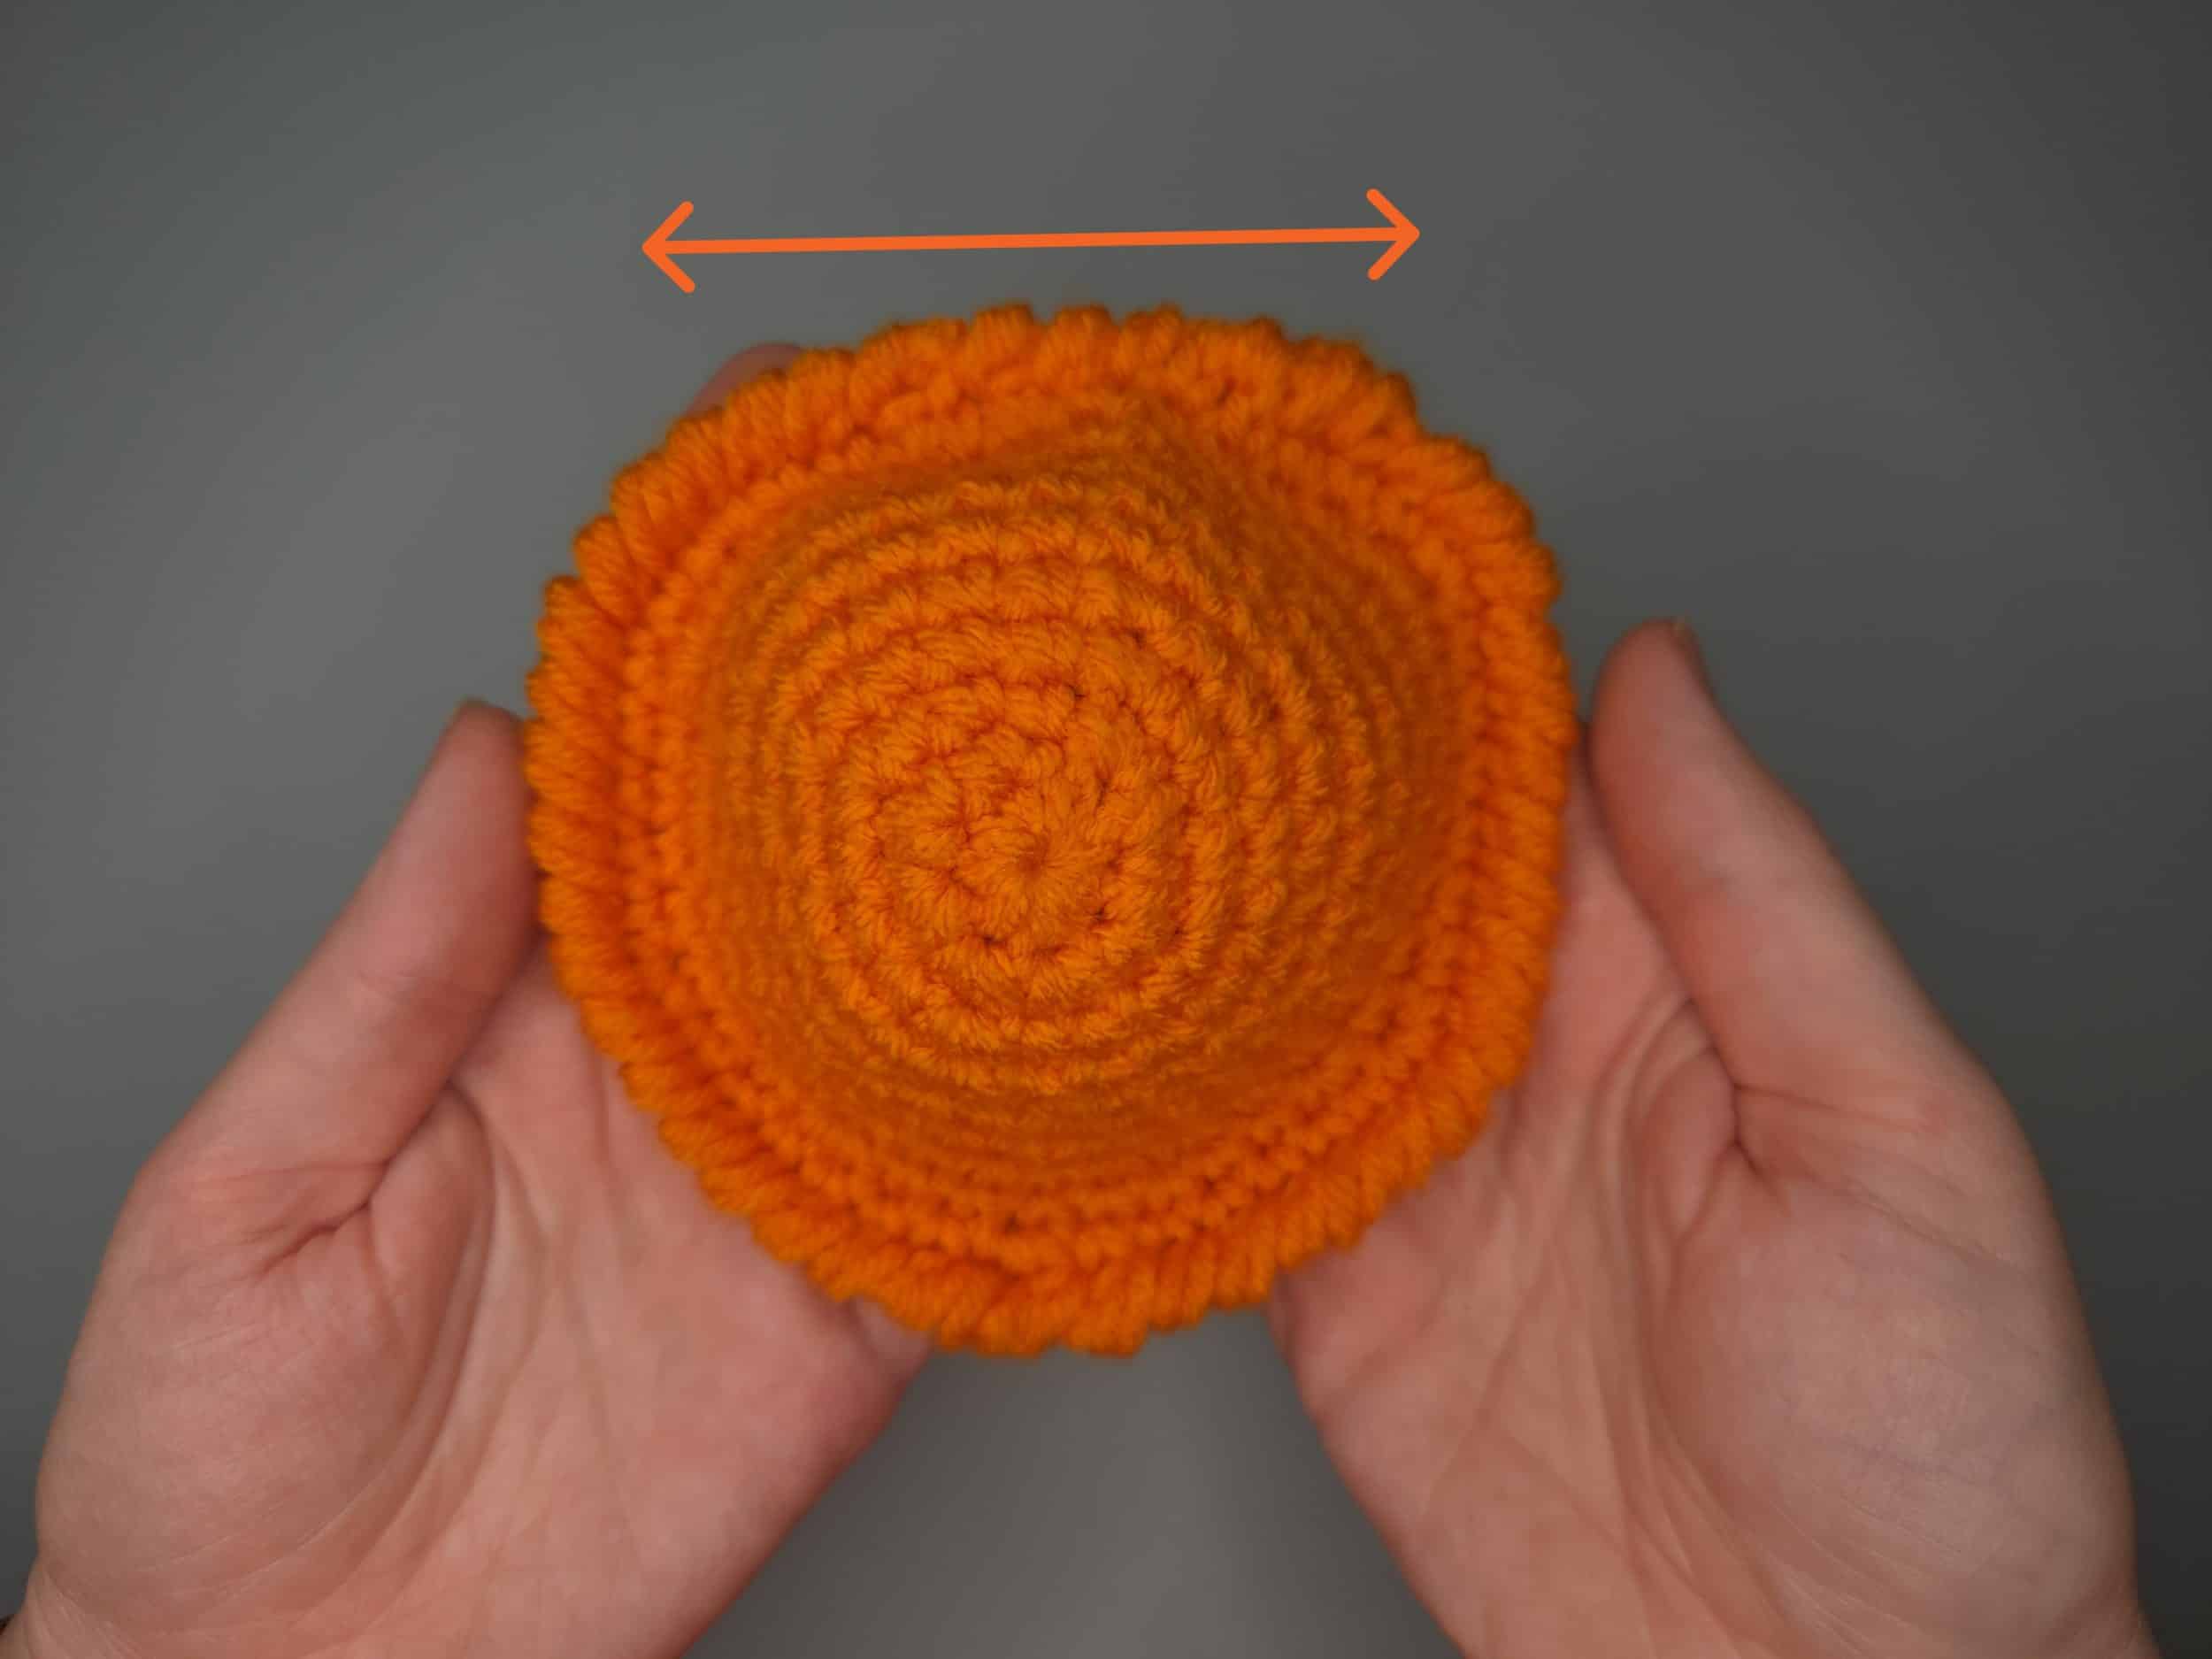
The head will be attached to the straighter side of the body's circle, illustrated by the arrow in the picture above.
Back Legs (Make 2)
Ch 8
Row 1: Sl st in 2nd ch from hook and next ch (2 sl st). Ch 3, sl st in 2nd ch from hook and next ch (toe made). Sl st in remaining chain sts to end, ch 1, sl st in same end ch st and turn corner. Working up opposite side of foundation chain: sl st in next 3 ch, ch 3, sl st in 2nd ch from hook and next ch (second toe made), sl st to center of leg.
Fasten off, leaving a long tail for sewing.
Materials:
- Four colors of yarn: body, eyes, "x" pupil, tongue and mouth (worsted weight acrylic recommended).
- Hook: Size 5mm or the size recommended for your yarn.
- Scissors
- Tapestry Needle
Front Legs (Make 2)
Ch 6.
Row 1: Sl st in 2nd ch from hook and next ch. Ch 2, sl st in 2nd ch from hook (toe made), sl st in remaining chains to end, ch 1, sl st in end ch st to turn corner. Ch 2, sl st in 2nd ch from hook (second toe made), sl st in remaining chains up opposite side to center.
Fasten off, leave long tail for sewing.
Eyes (Make 2)
Back of Eyes / Eyelids
MR: 4 sc [4 sts]
Rnd 1: Inc in all [8 sts]
Rnd 2: Ch1 (doesn't count). Sc in each st around. Sl st to 1st st. [8 sts]
Fasten off, weave in the starting tail. Leave long end tail for sewing.
This end tail will need to be long, as it is the yarn that will be whipped-stitched around both pieces of the eye to make the complete eye.
Front of Eyes
MR: 4 sc [4 sts]
Rnd 1: Inc in all [8 sts]
Fasten off, weaving in the ends
Assembling Eyes
Embroider an "X" pupil before sewing together. The "X" is sewn onto the front of the eye. I left both the tails from the white and black yarn longer. Using this to stuff the back of the eye, giving it a circular shape.
See images below showing how the X is worked around the starting round 1 of the front of the eye.
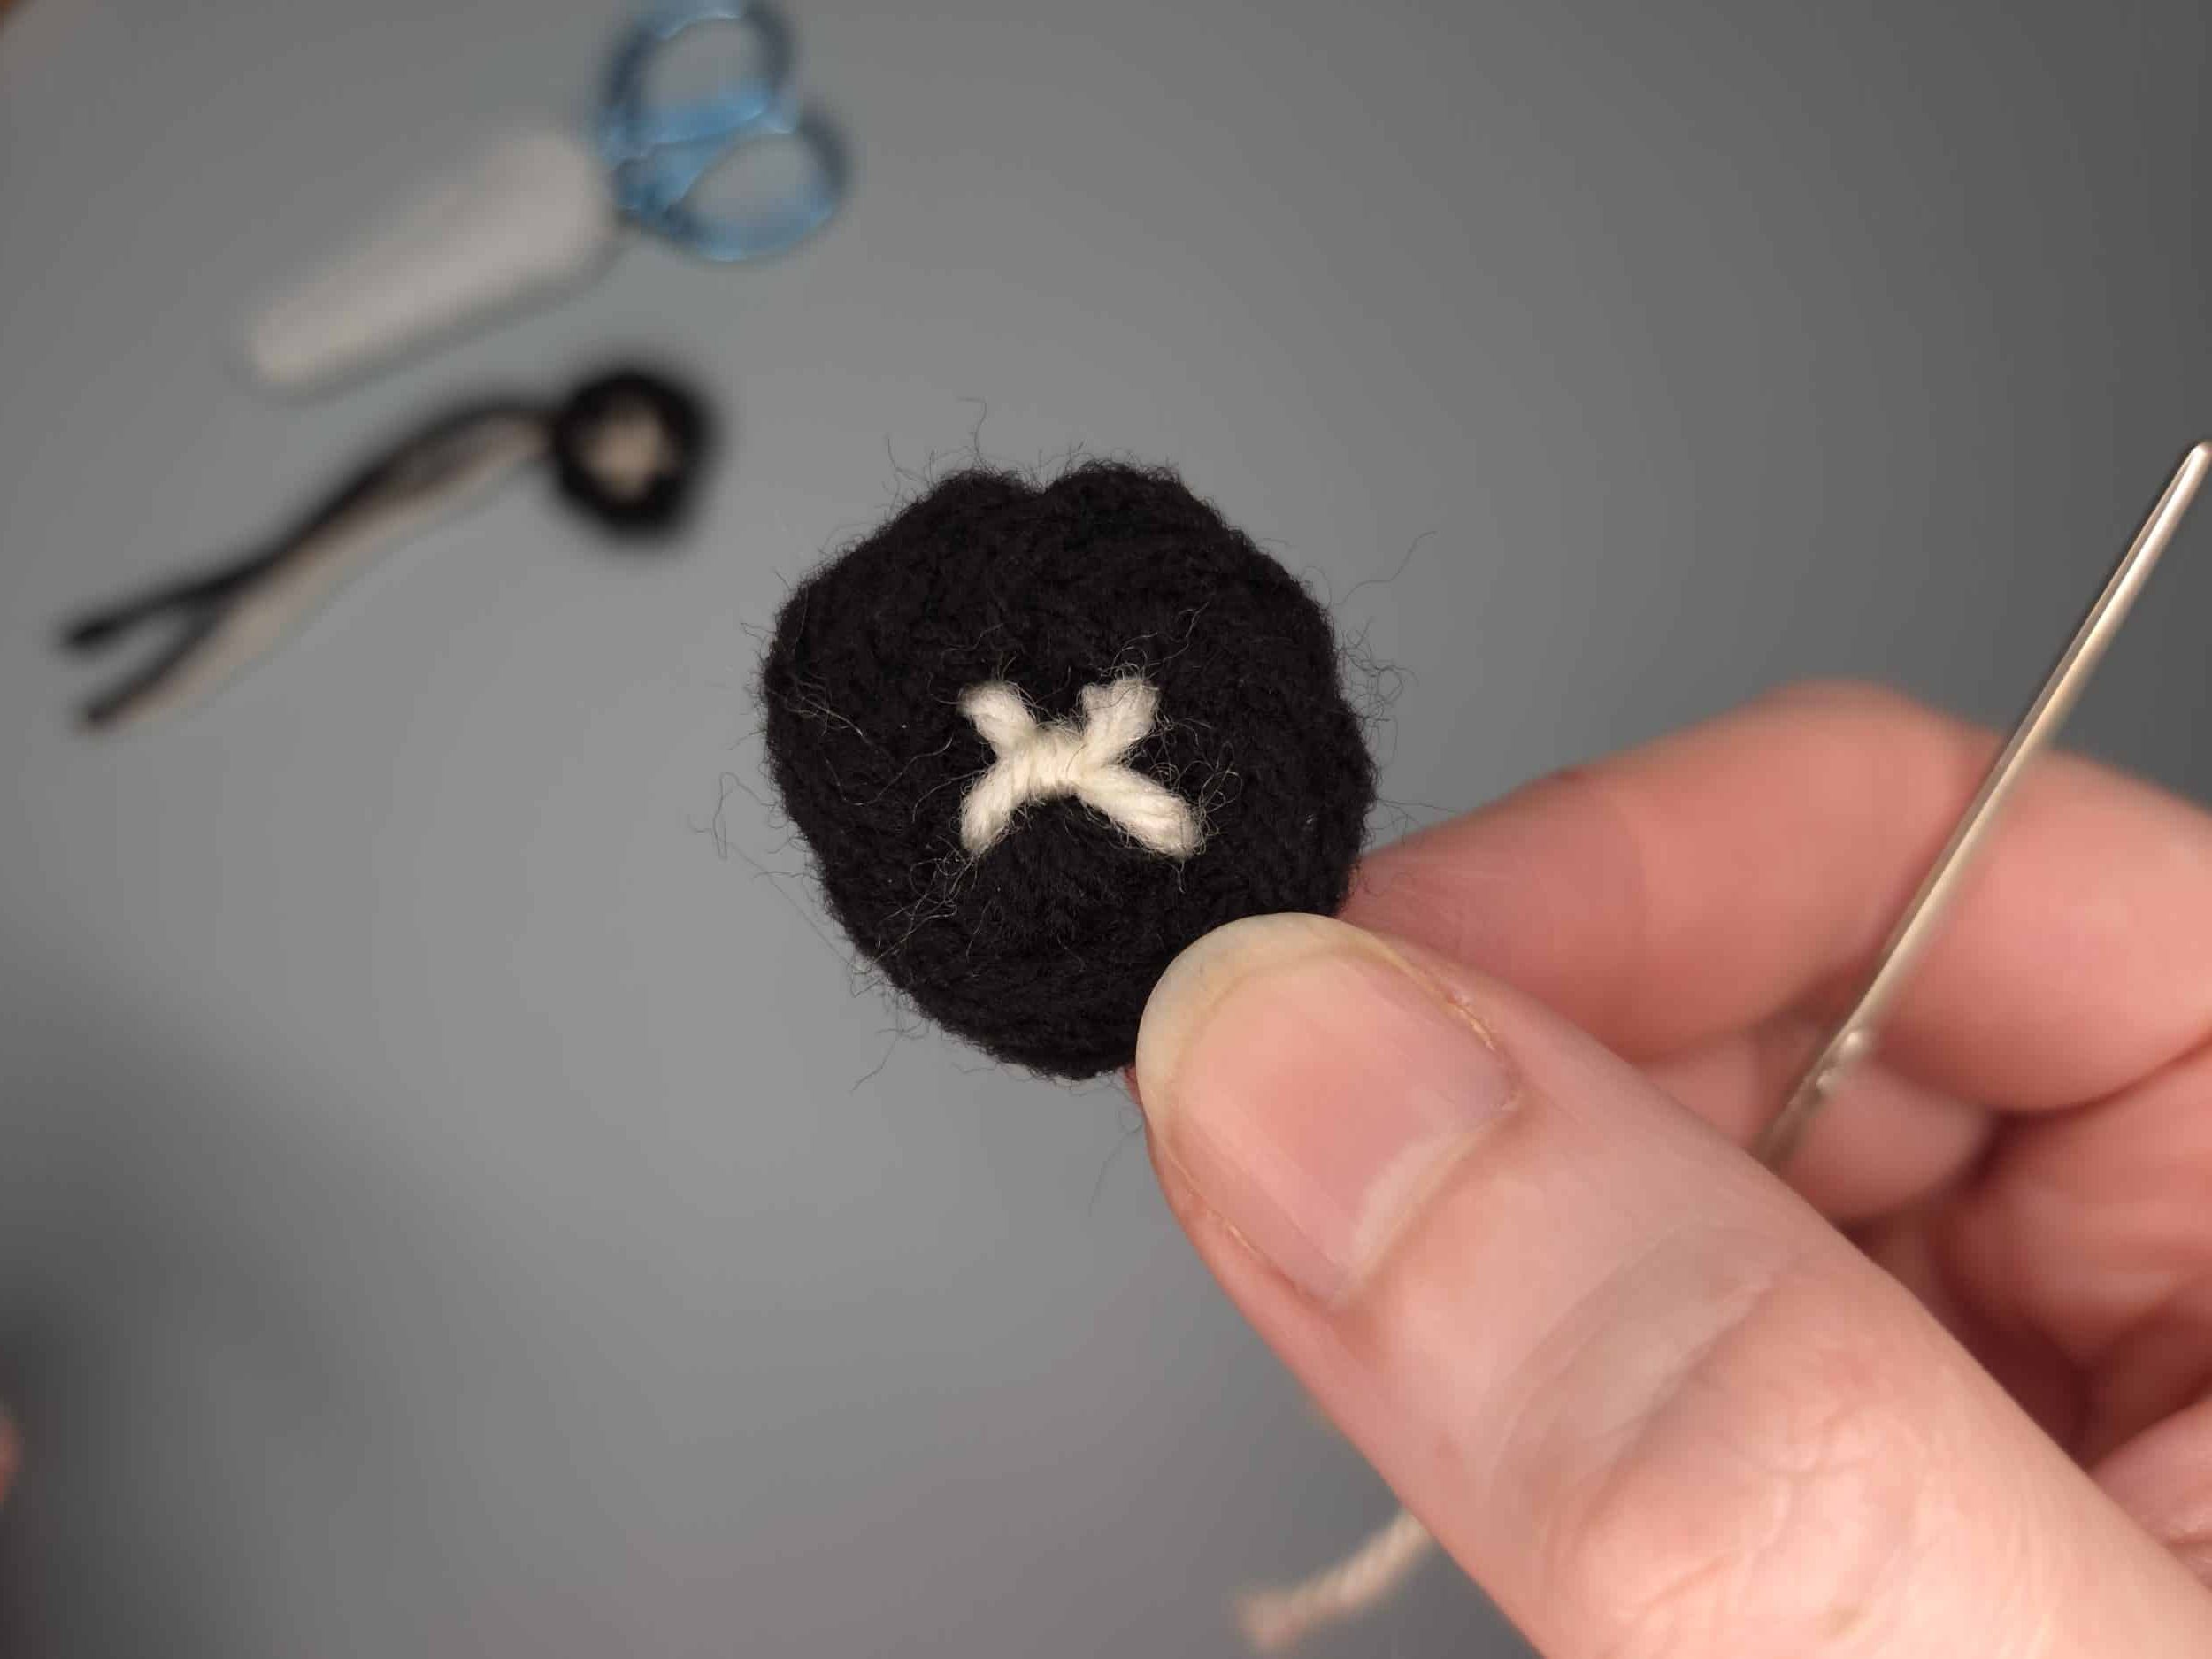
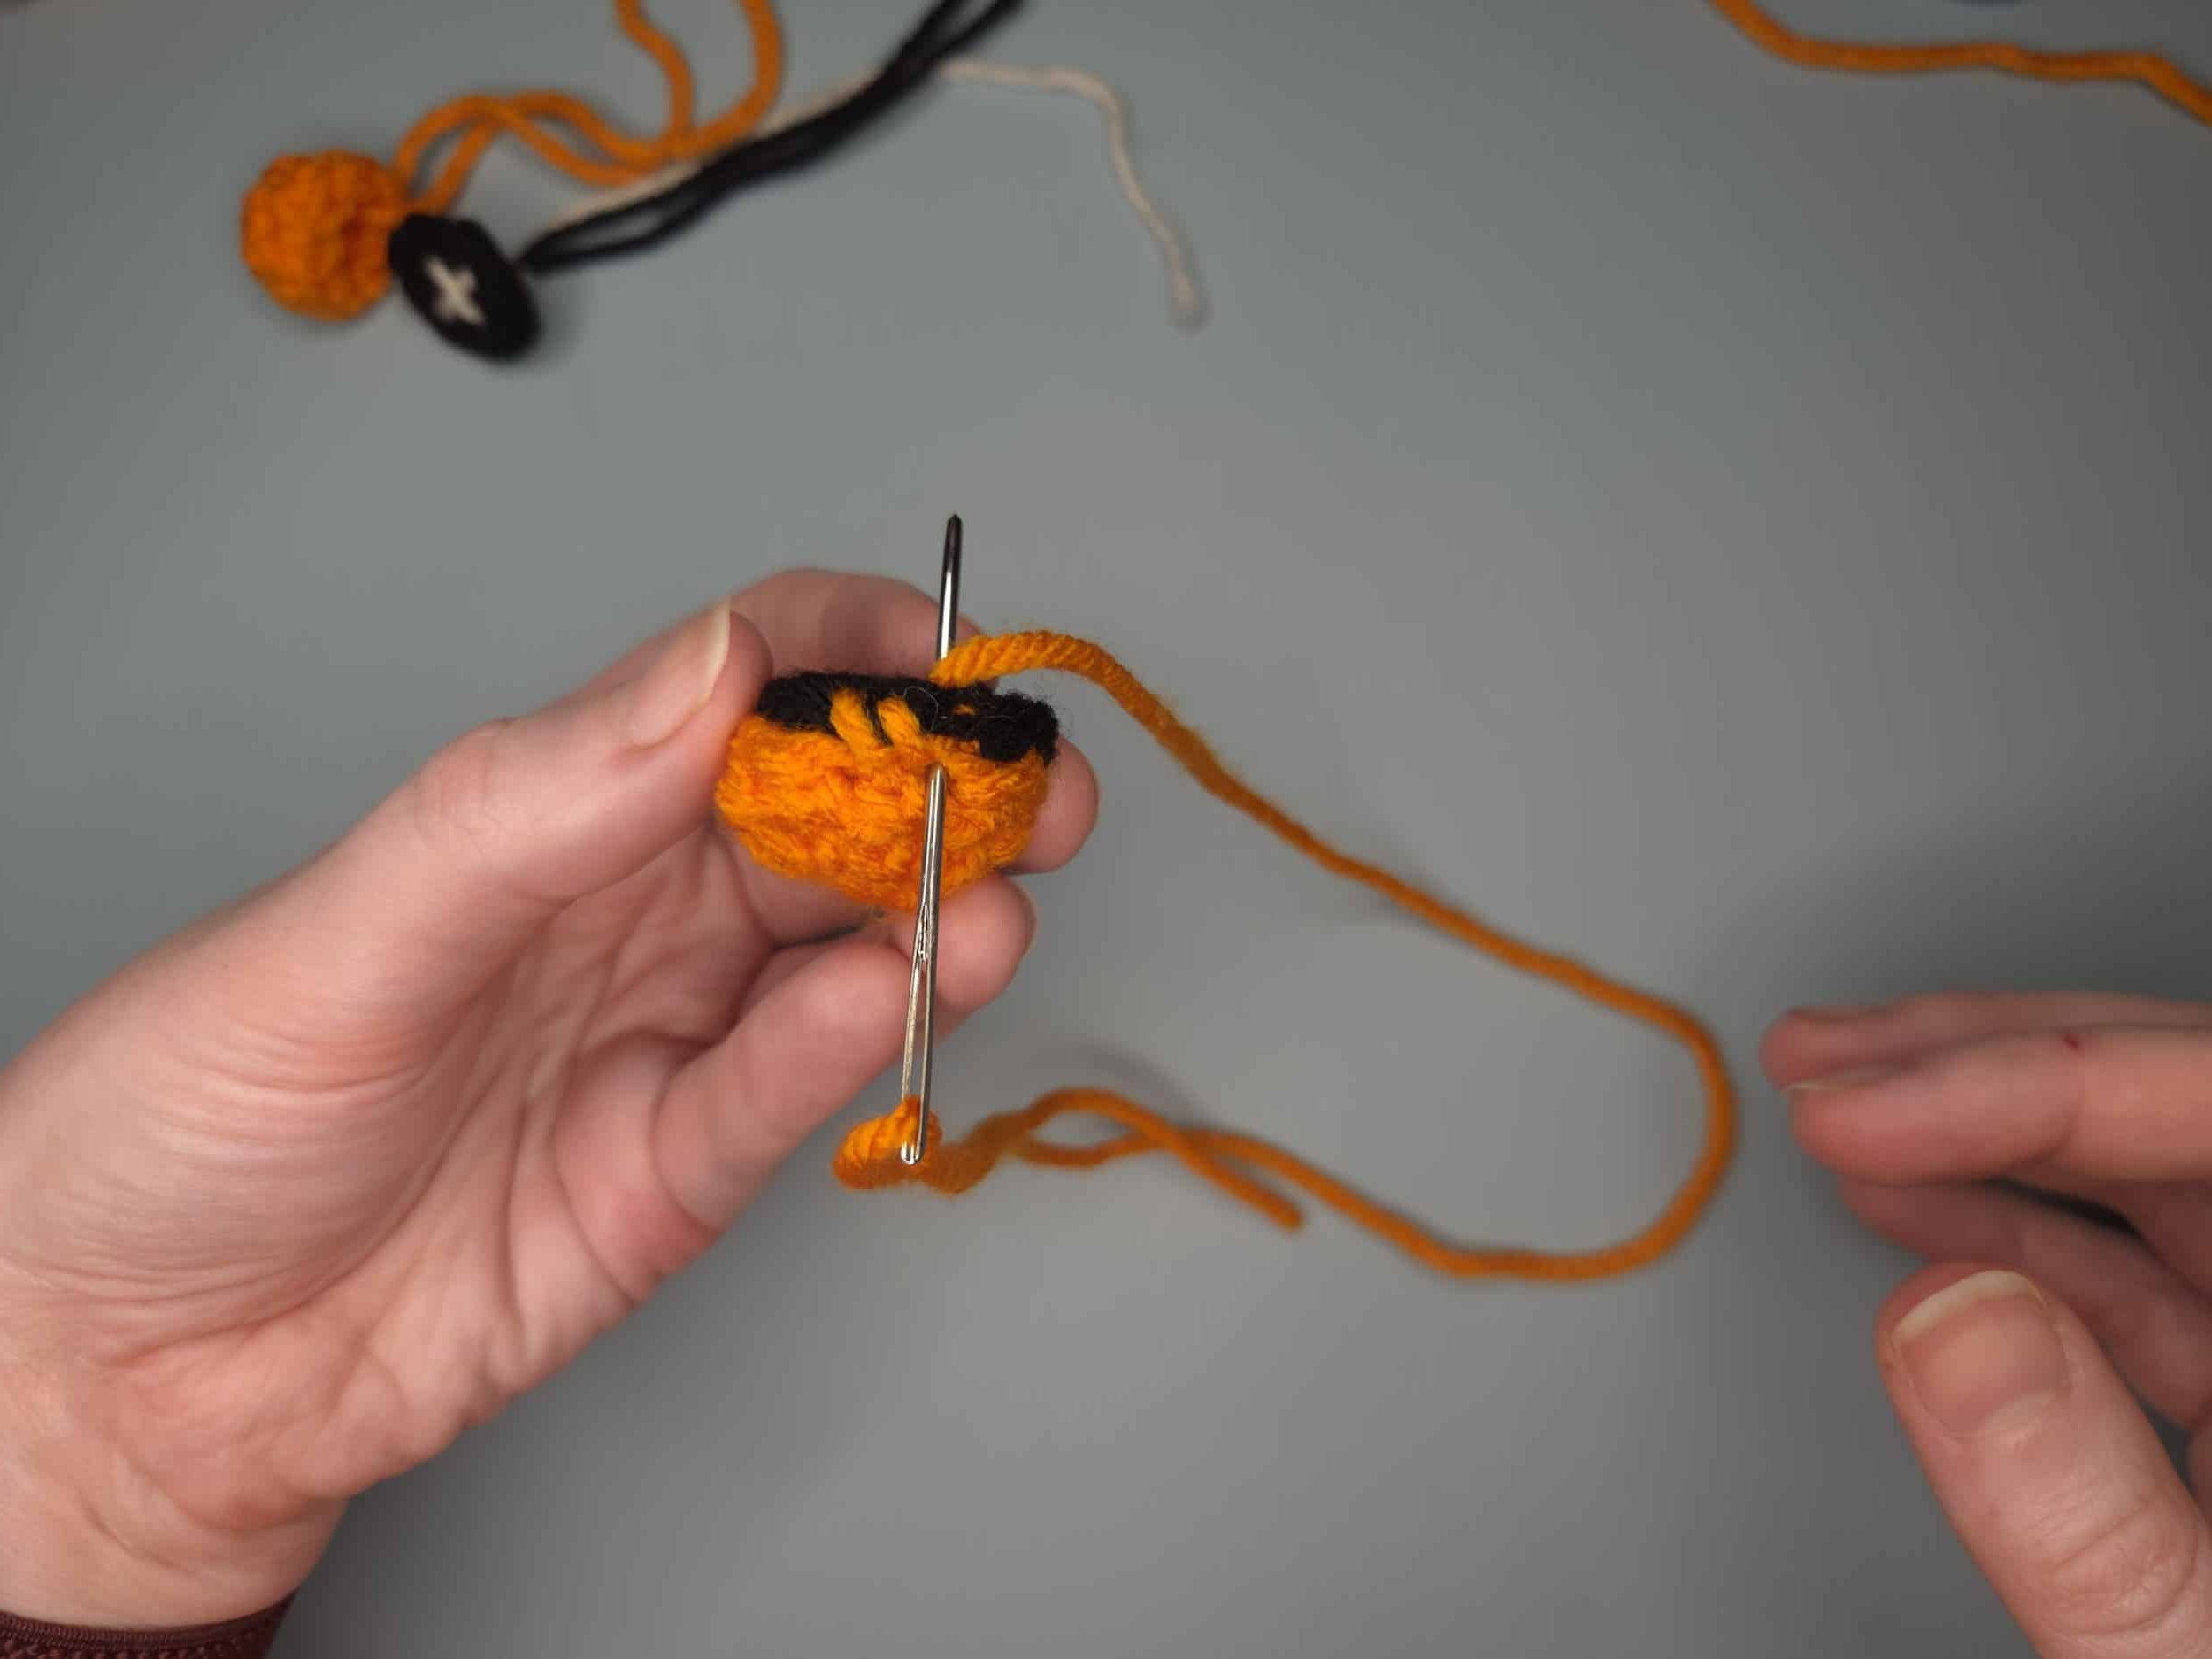
Using the remaining tail from the back of the eye, whip stitch the whites to the backs. Use yarn scraps or polyfill.
The image below shows how the two pieces were sewn together. Insert the tapestry needle on the same side each time. Whipping the yarn over. This was done around the whole eye.
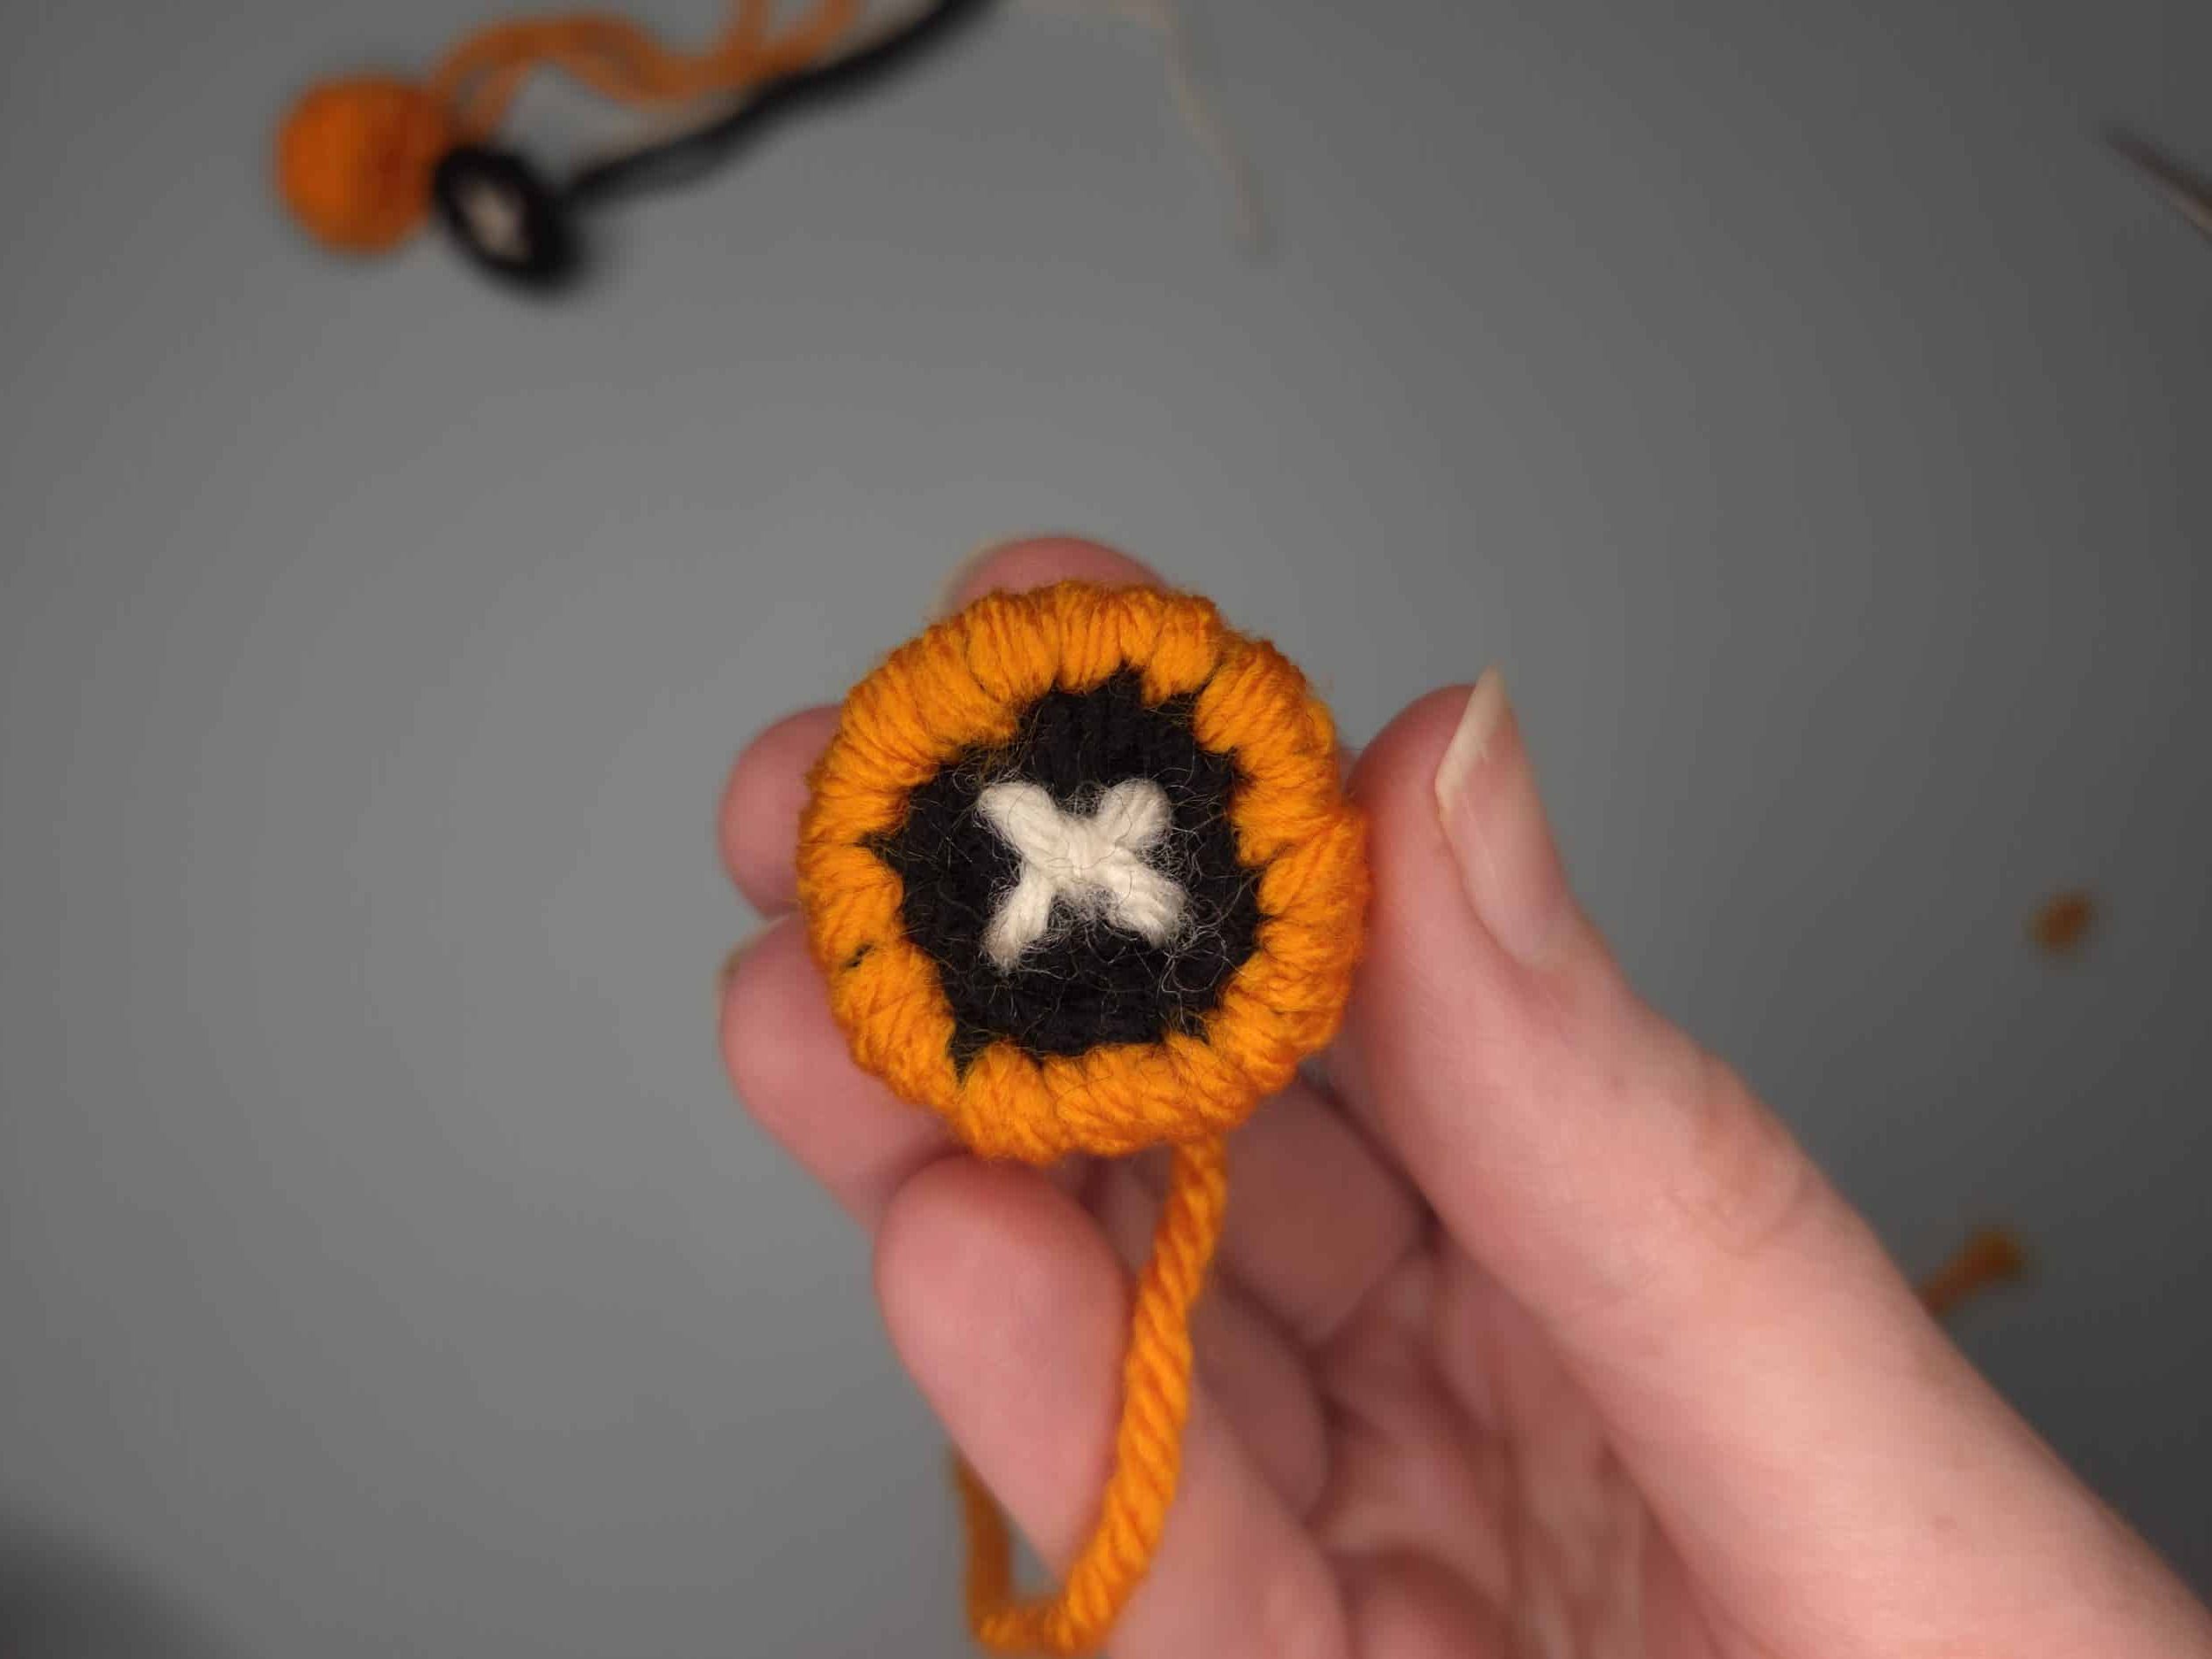
Below is the completed image of the eye. Once both eyes are made, set them aside. They will then be sewn onto the head.
Mouth
MR: 6 sc [6 sts]
Rnd 1: Inc in all [12 sts]
Rnd 2: (2 sc, inc) repeat 4 times [16 sts]
Rnd 3: (3 sc, inc) repeat 4 times [20 sts].
Fasten off, leave long tail for sewing to head. Weave in starting tail.
Attach the tongue to the center of the mouth before sewing the mouth to the head opening.
Tongue
Ch 12.
Row 1: Sl st in 2nd ch from hook and in each ch across [11 sl st]
Fasten off, leave long tail. Attach to the center of the mouth.
Embroidery
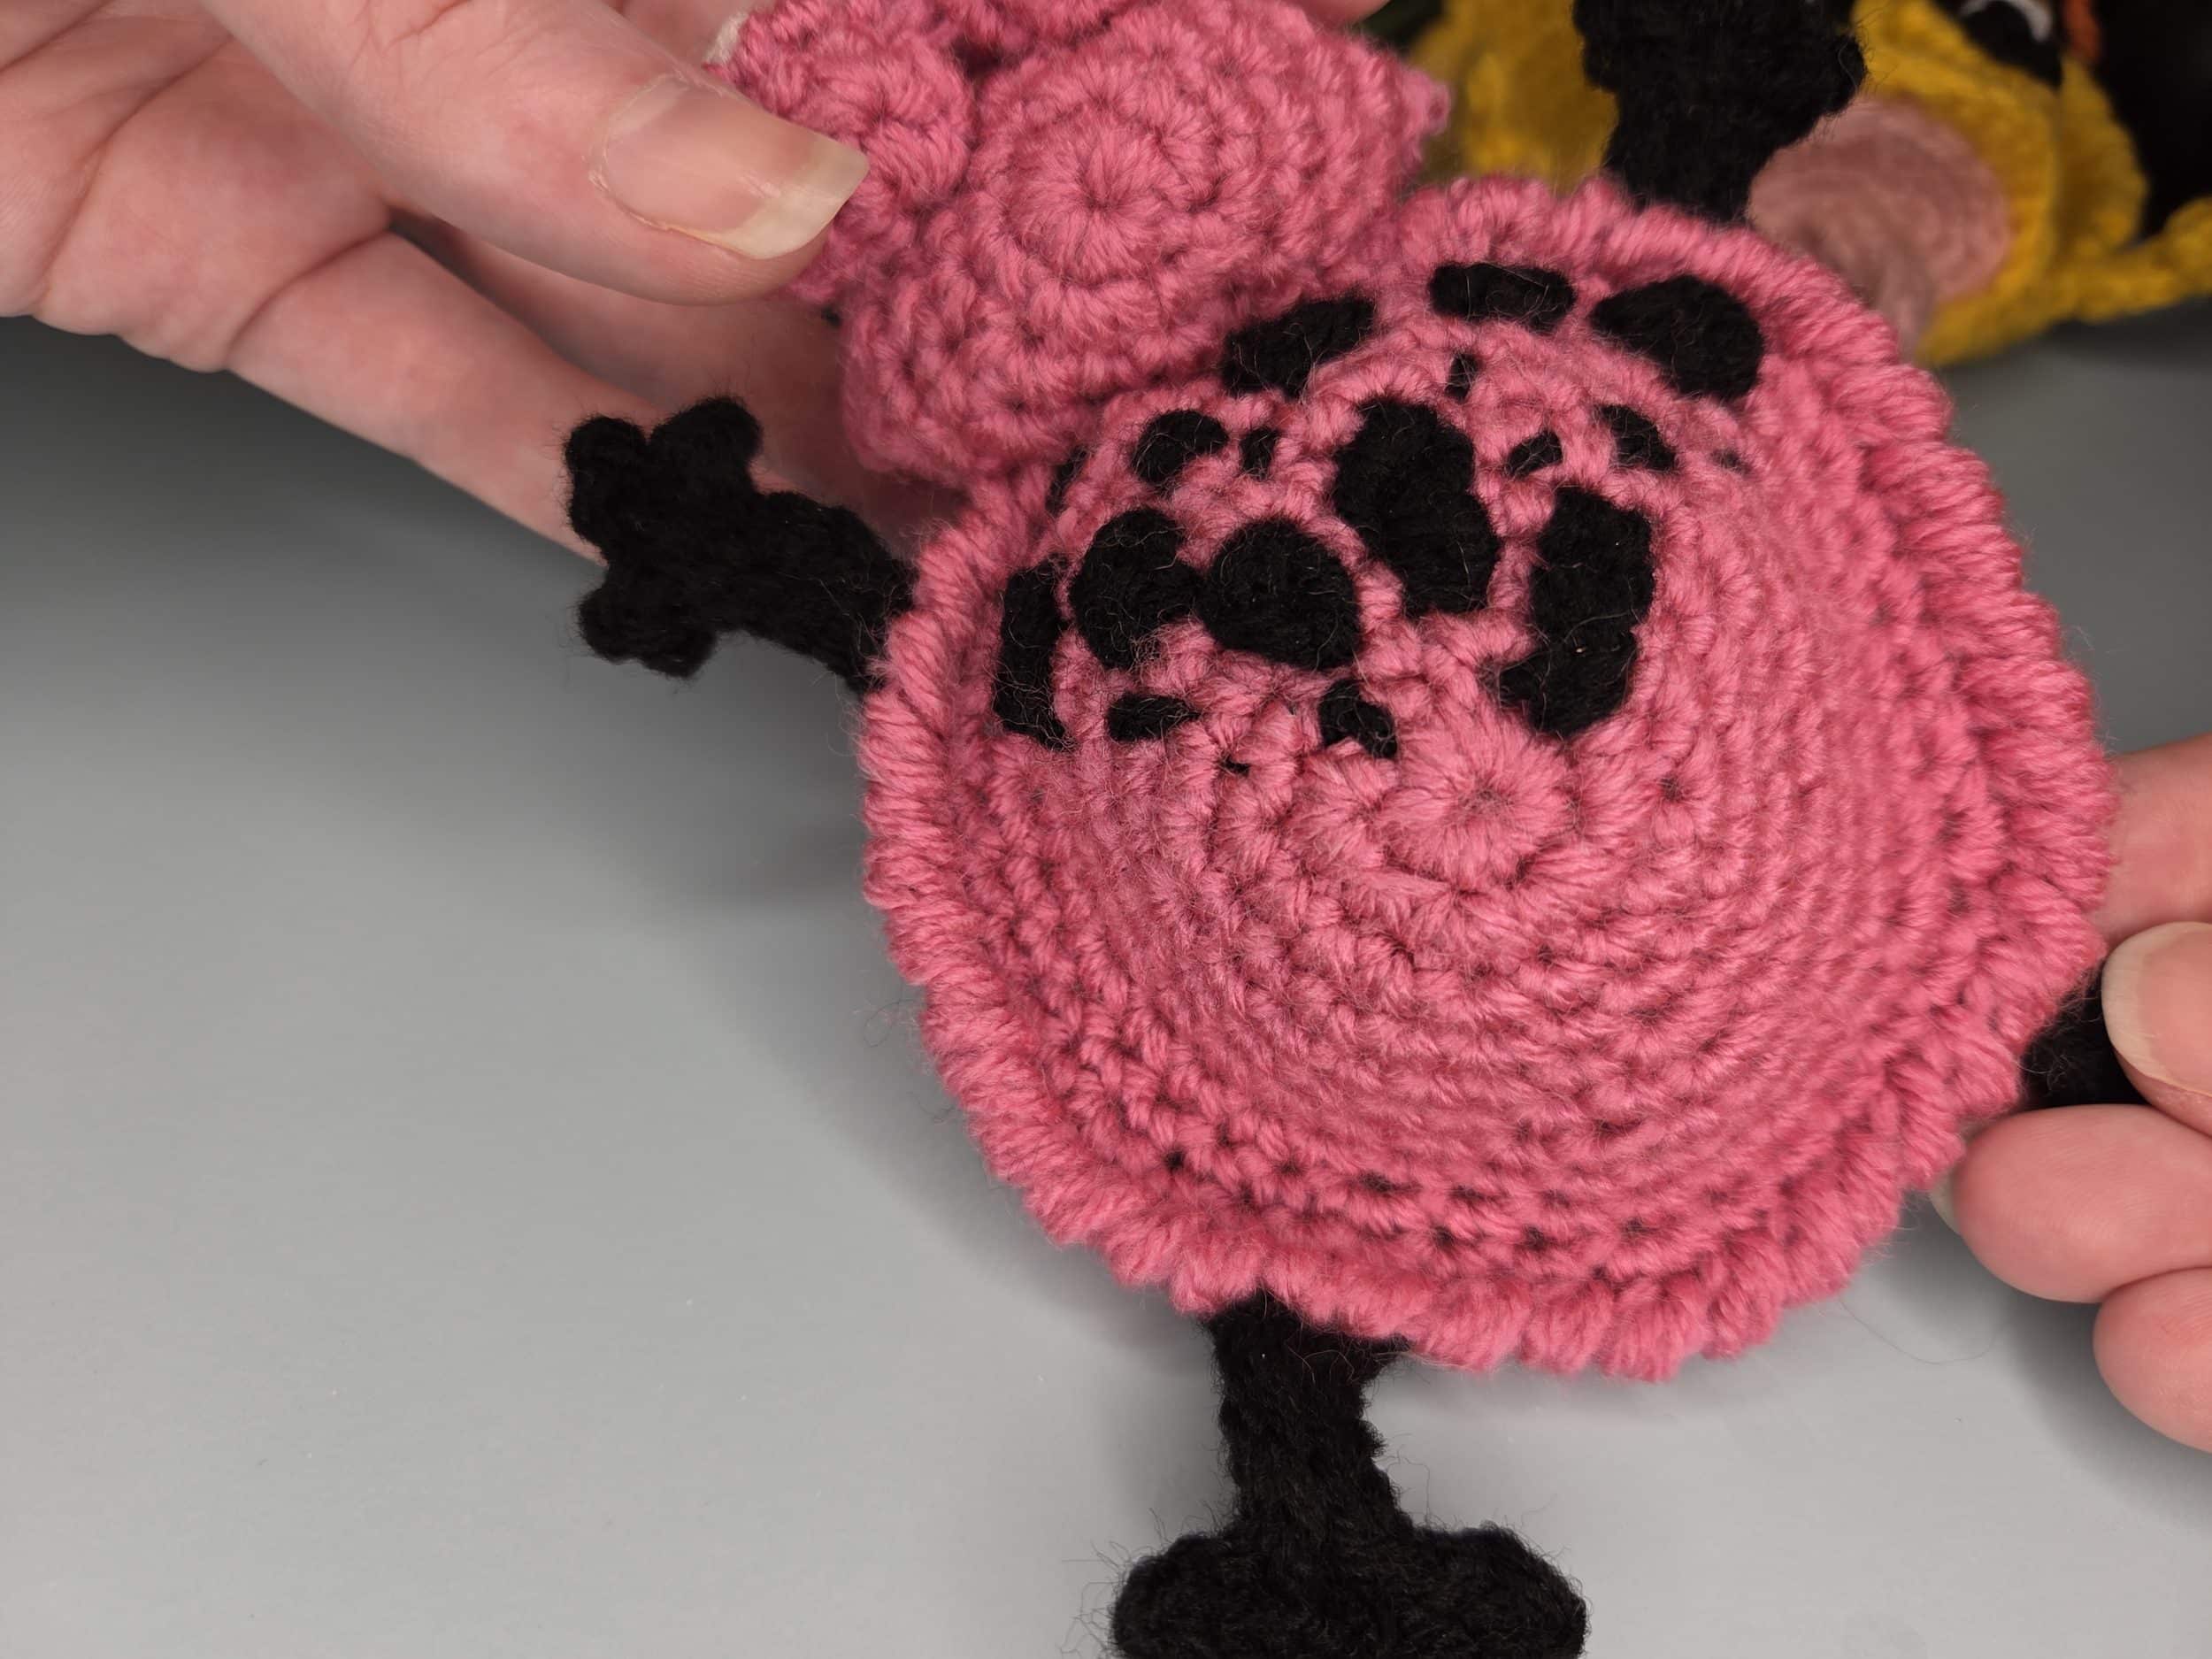
For the whole set, I wanted to make each of my frogs different from one another. So all got different body colors, eye colors, different colored legs, and some got cute embroidered legs.
The embroidery process was a winging it. I am not very experienced when it comes to embroidery. I did a general outline of what I wanted the blob to look like them I filled them in, much like a satin stitch. Then I did random lines and smaller blobs and French knots throughout the back.
Below is a close-up of the back of an embroidered one for reference, but this step is completely optional.
Assembling the frog
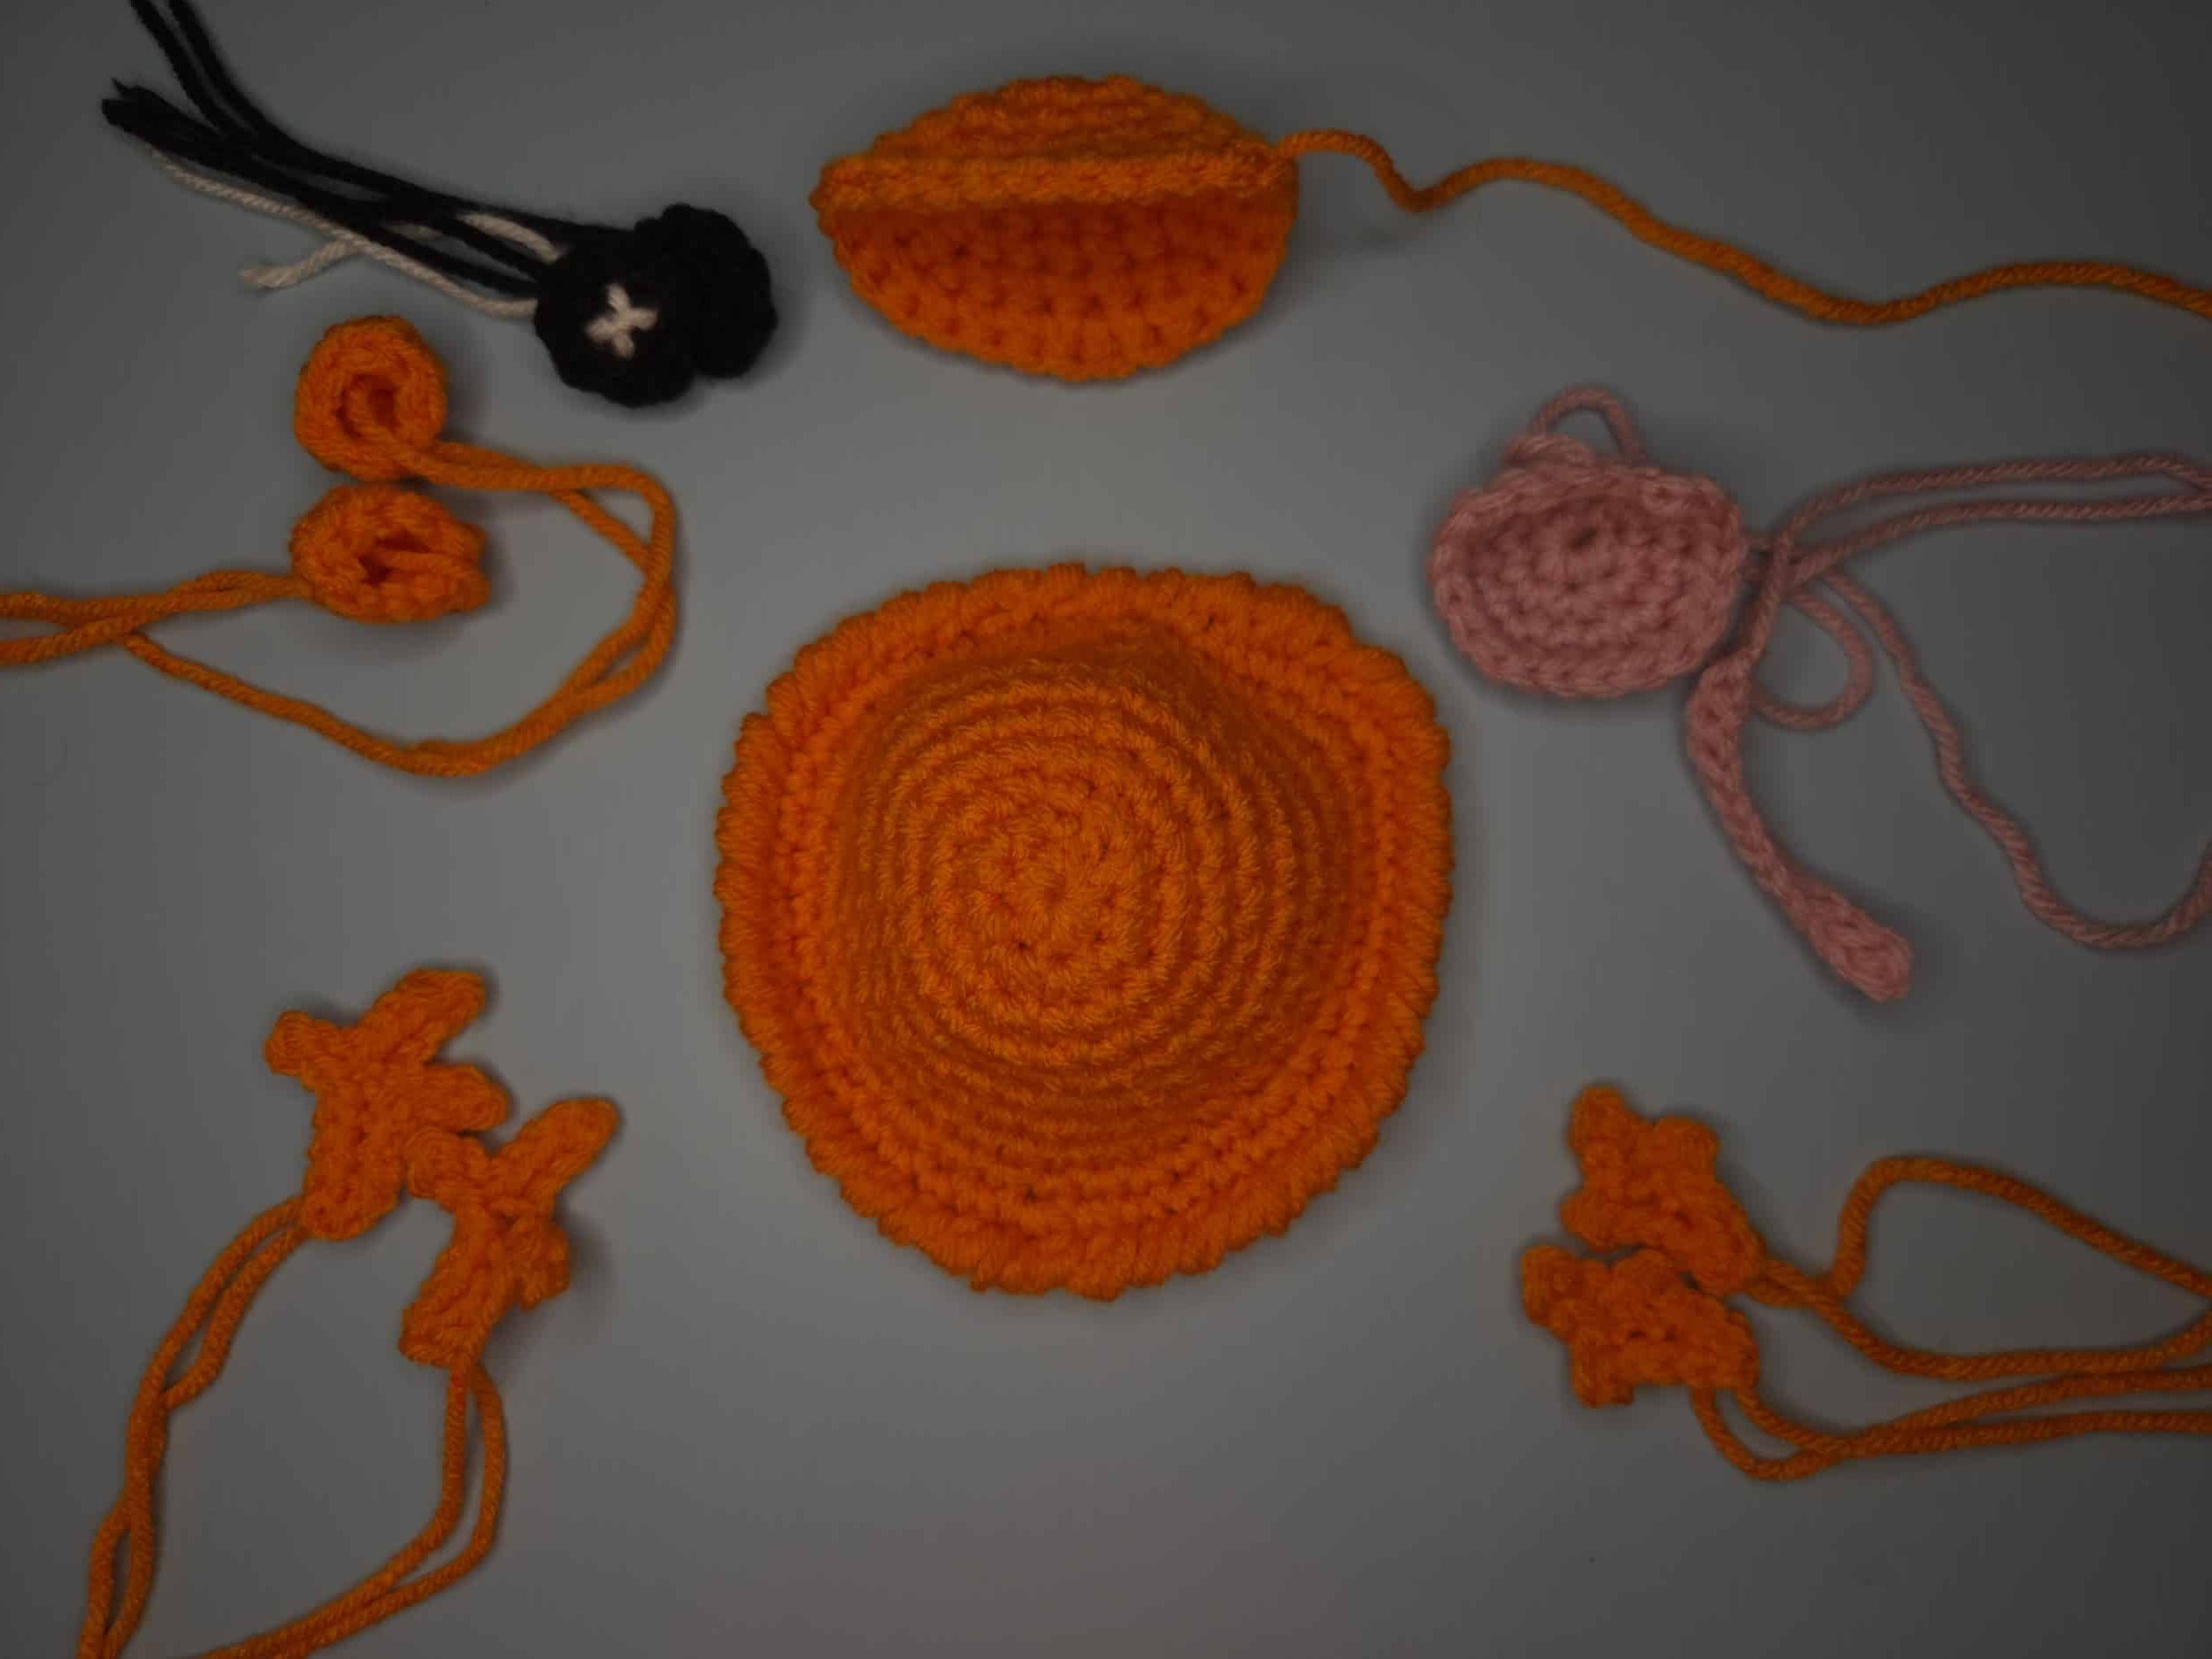
- Embroider pupils on whites (front) and whip-stitch the front and back of the eyes together. Leave extra yarn from the front of the eye to stuff.
- Sew the tongue into the center of the mouth.
- Attach the mouth to the opening of the head. Using any extra tails, scrap yarn, or polyfill to stuff the head.
- Sew eyes to the top of the head.
- Attach the head to the body base. Making sure to place the head on the straighter side of the body.
- Attach front and back legs symmetrically around the main body.
- Weave in any ends securely.
- Place a coffee cup on the coaster, and smile... hopefully the second time, because you mindfully smiled during the make

Thank you
Seriously, thanks so much for checking out my frog coaster pattern and hanging out on my little corner of the internet. It genuinely means a lot, and people actually looking at what I make is how this whole site keeps growing.
If you made one of these little guys, I hope it brought a smile to your face (or at least made you laugh while you were wrestling with the eyes). There are plenty more free patterns over in my library if you're looking for your next project.
And if you want to keep up with more slow crafting, mindful moments, or whatever weird yarn project I'm getting into next, you can find me over on Instagram, YouTube, TikTok, and Pinterest.
Please do not copy, repost, or distribute this pattern as your own. You are welcome to sell finished items made from this pattern, but please credit Yarnful Mind as the designer. Thank you for supporting my work and honoring creative boundaries.