Finding a moment for yourself is easy with a little help from this free crochet pattern.
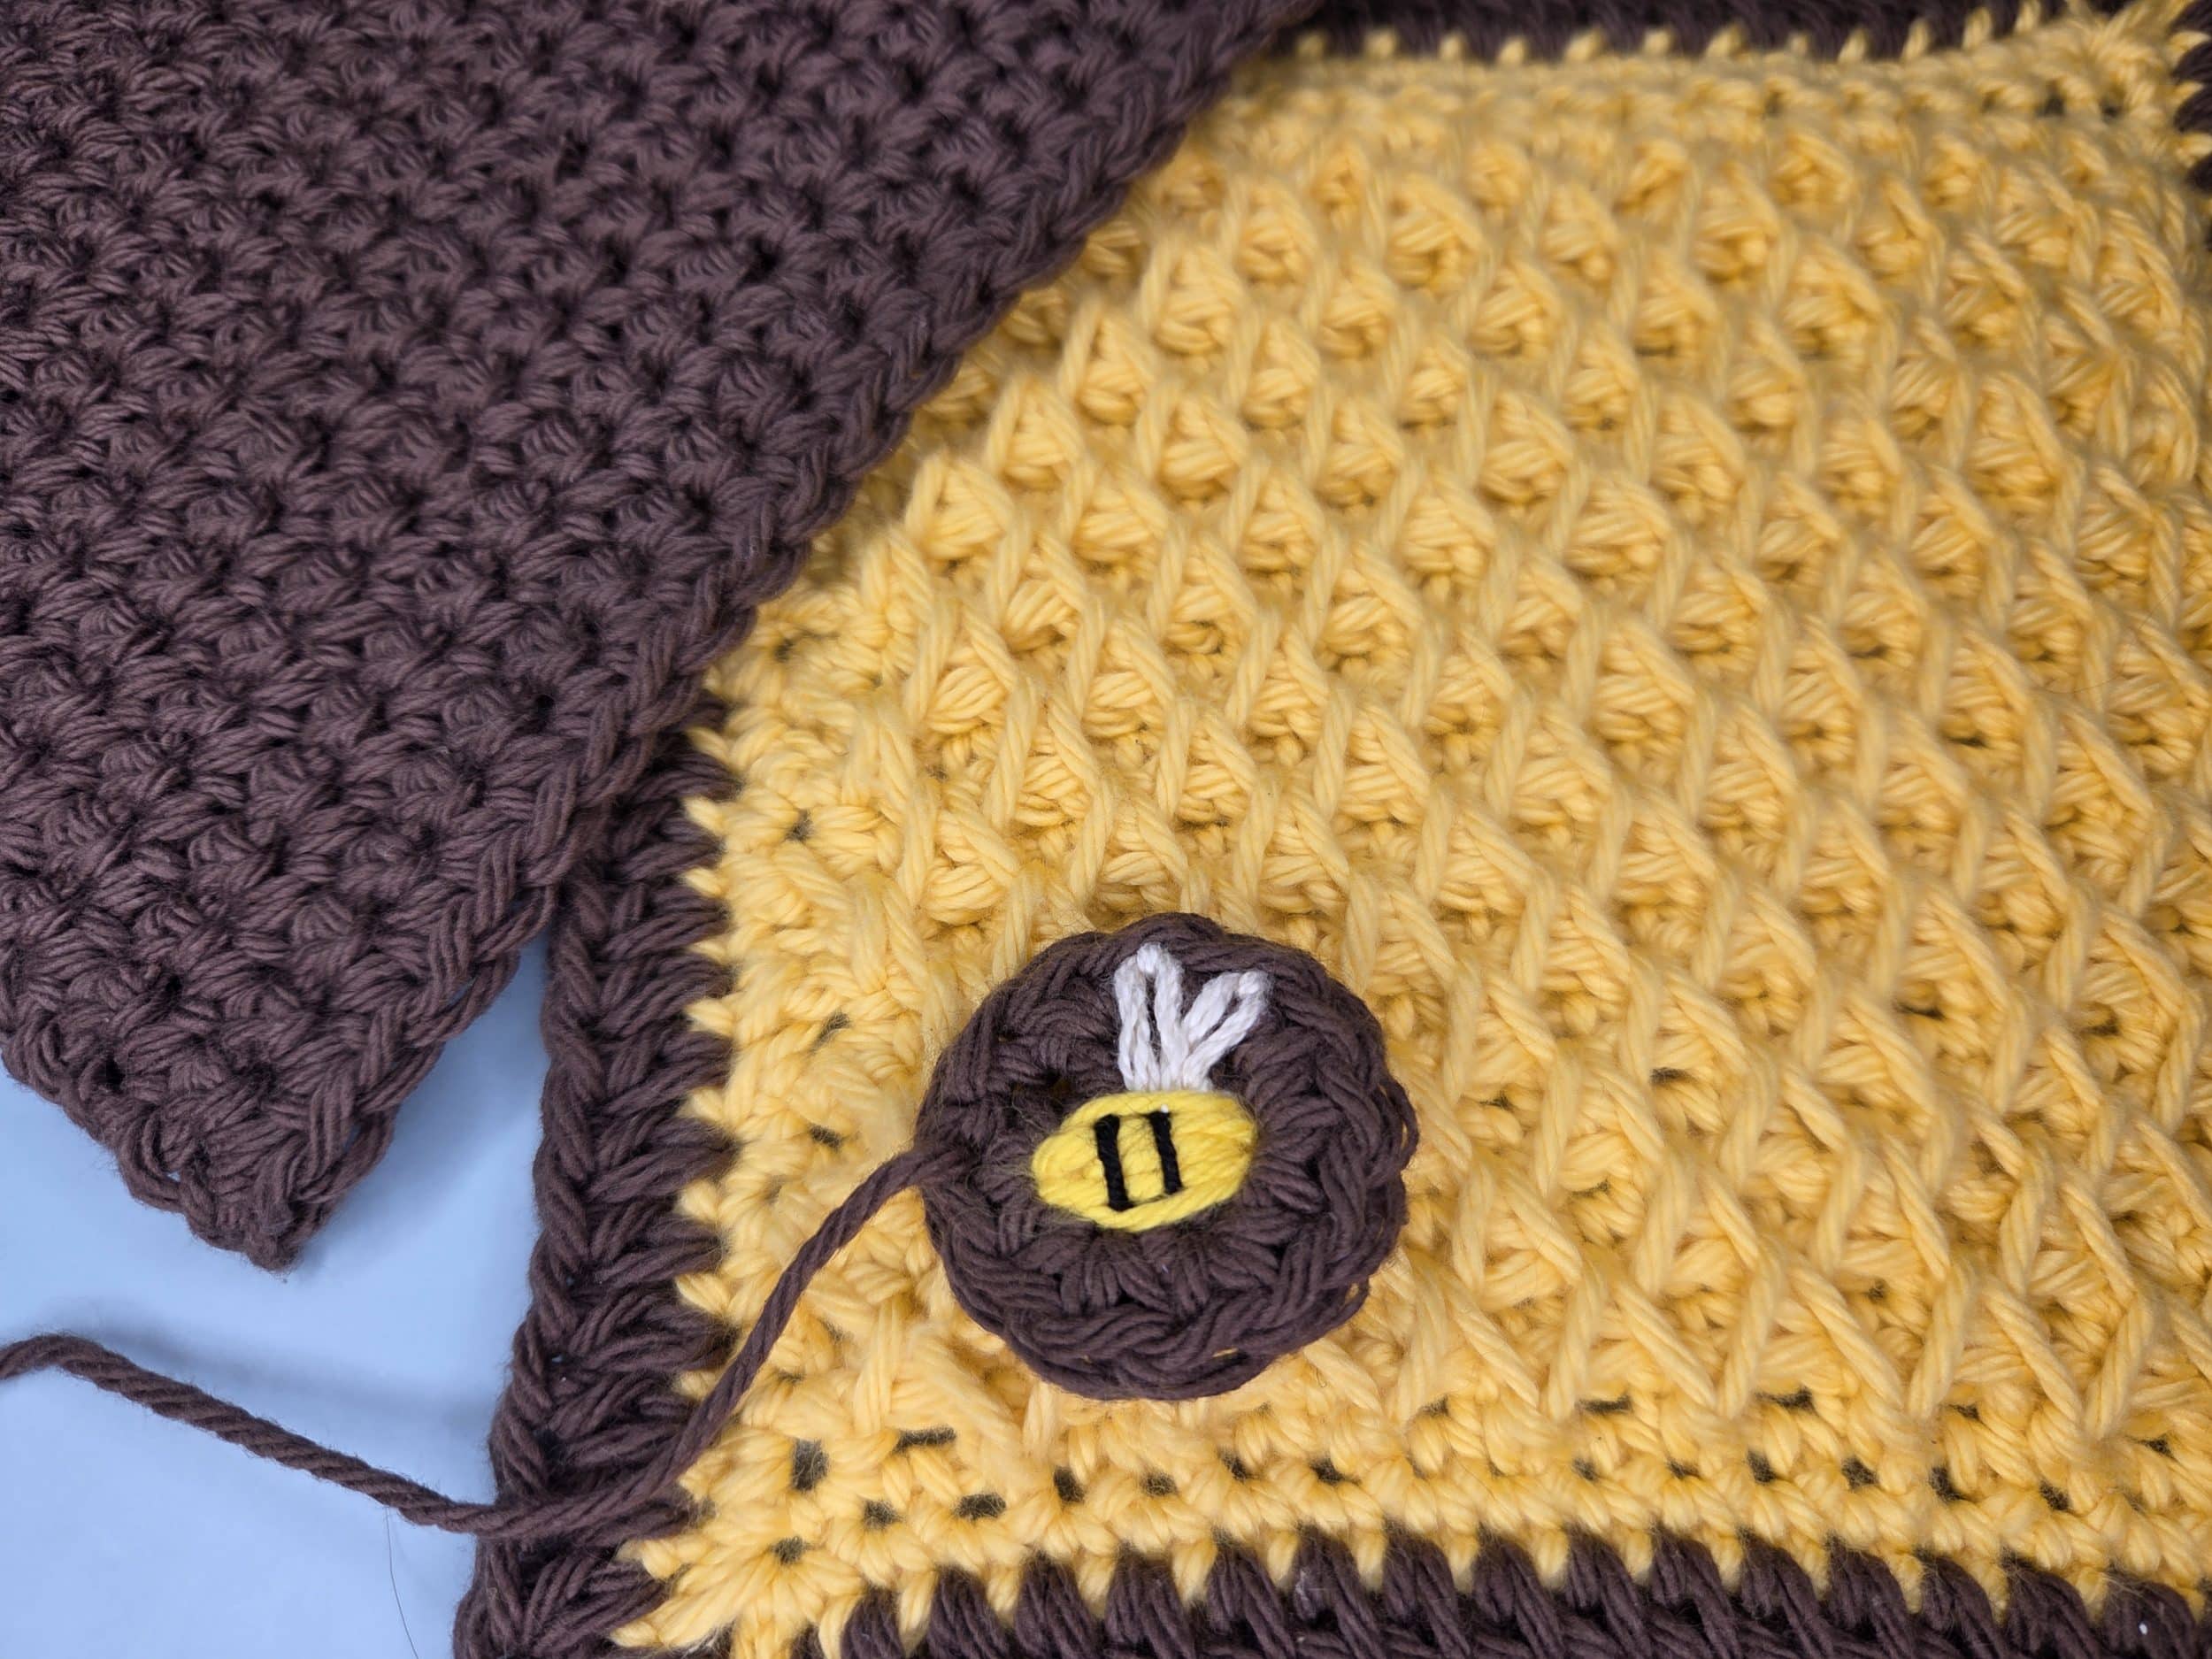
The pattern base is a smock or honeycomb stitch in yellow, with a simple hdc stitch border in brown. A single crochet brown back and one adorable embroidered bee complete this eye-catching hot pad.
This is a hot pad; please make sure you’re using appropriate cotton yarn that will not burn under heat. I have not tested this as an oven mitt or for removing things from the oven. Please don’t hurt yourself or your kitchen counters.
Difficulty:
Advanced Beginner
Gauge:
Final smock stitch square is approximately 5 in by 5 in
Stitches (US Terms):
- ch = chain
- sl st = slip stitch
- sc = single crochet
- hdc = half double crochet
- dc = double crochet
- st = stitch(es)
- sp = space
Materials:
- Two colors of yarn: Yarn A, Yarn B
- Yarn A: I Love This Cotton (326 Curry) approx. 30 grams
- Yarn B: Sugar n’ Cream (Warm Brown) approx. 36 grams
- Scrap yellow, black and white for the bee embroidery
- Hook: Size 5mm or the size recommended for your yarn.
- Scissors
- Tapestry Needle
Front Honeycomb Base (Smock Stitch Square)
Foundation Chain:
Ch 20 (Odd numbered multiple plus 1 turning ch)
Row 1:
Ch 1 (does not count). Sc in each st to end. [19 sc]
Row 2:
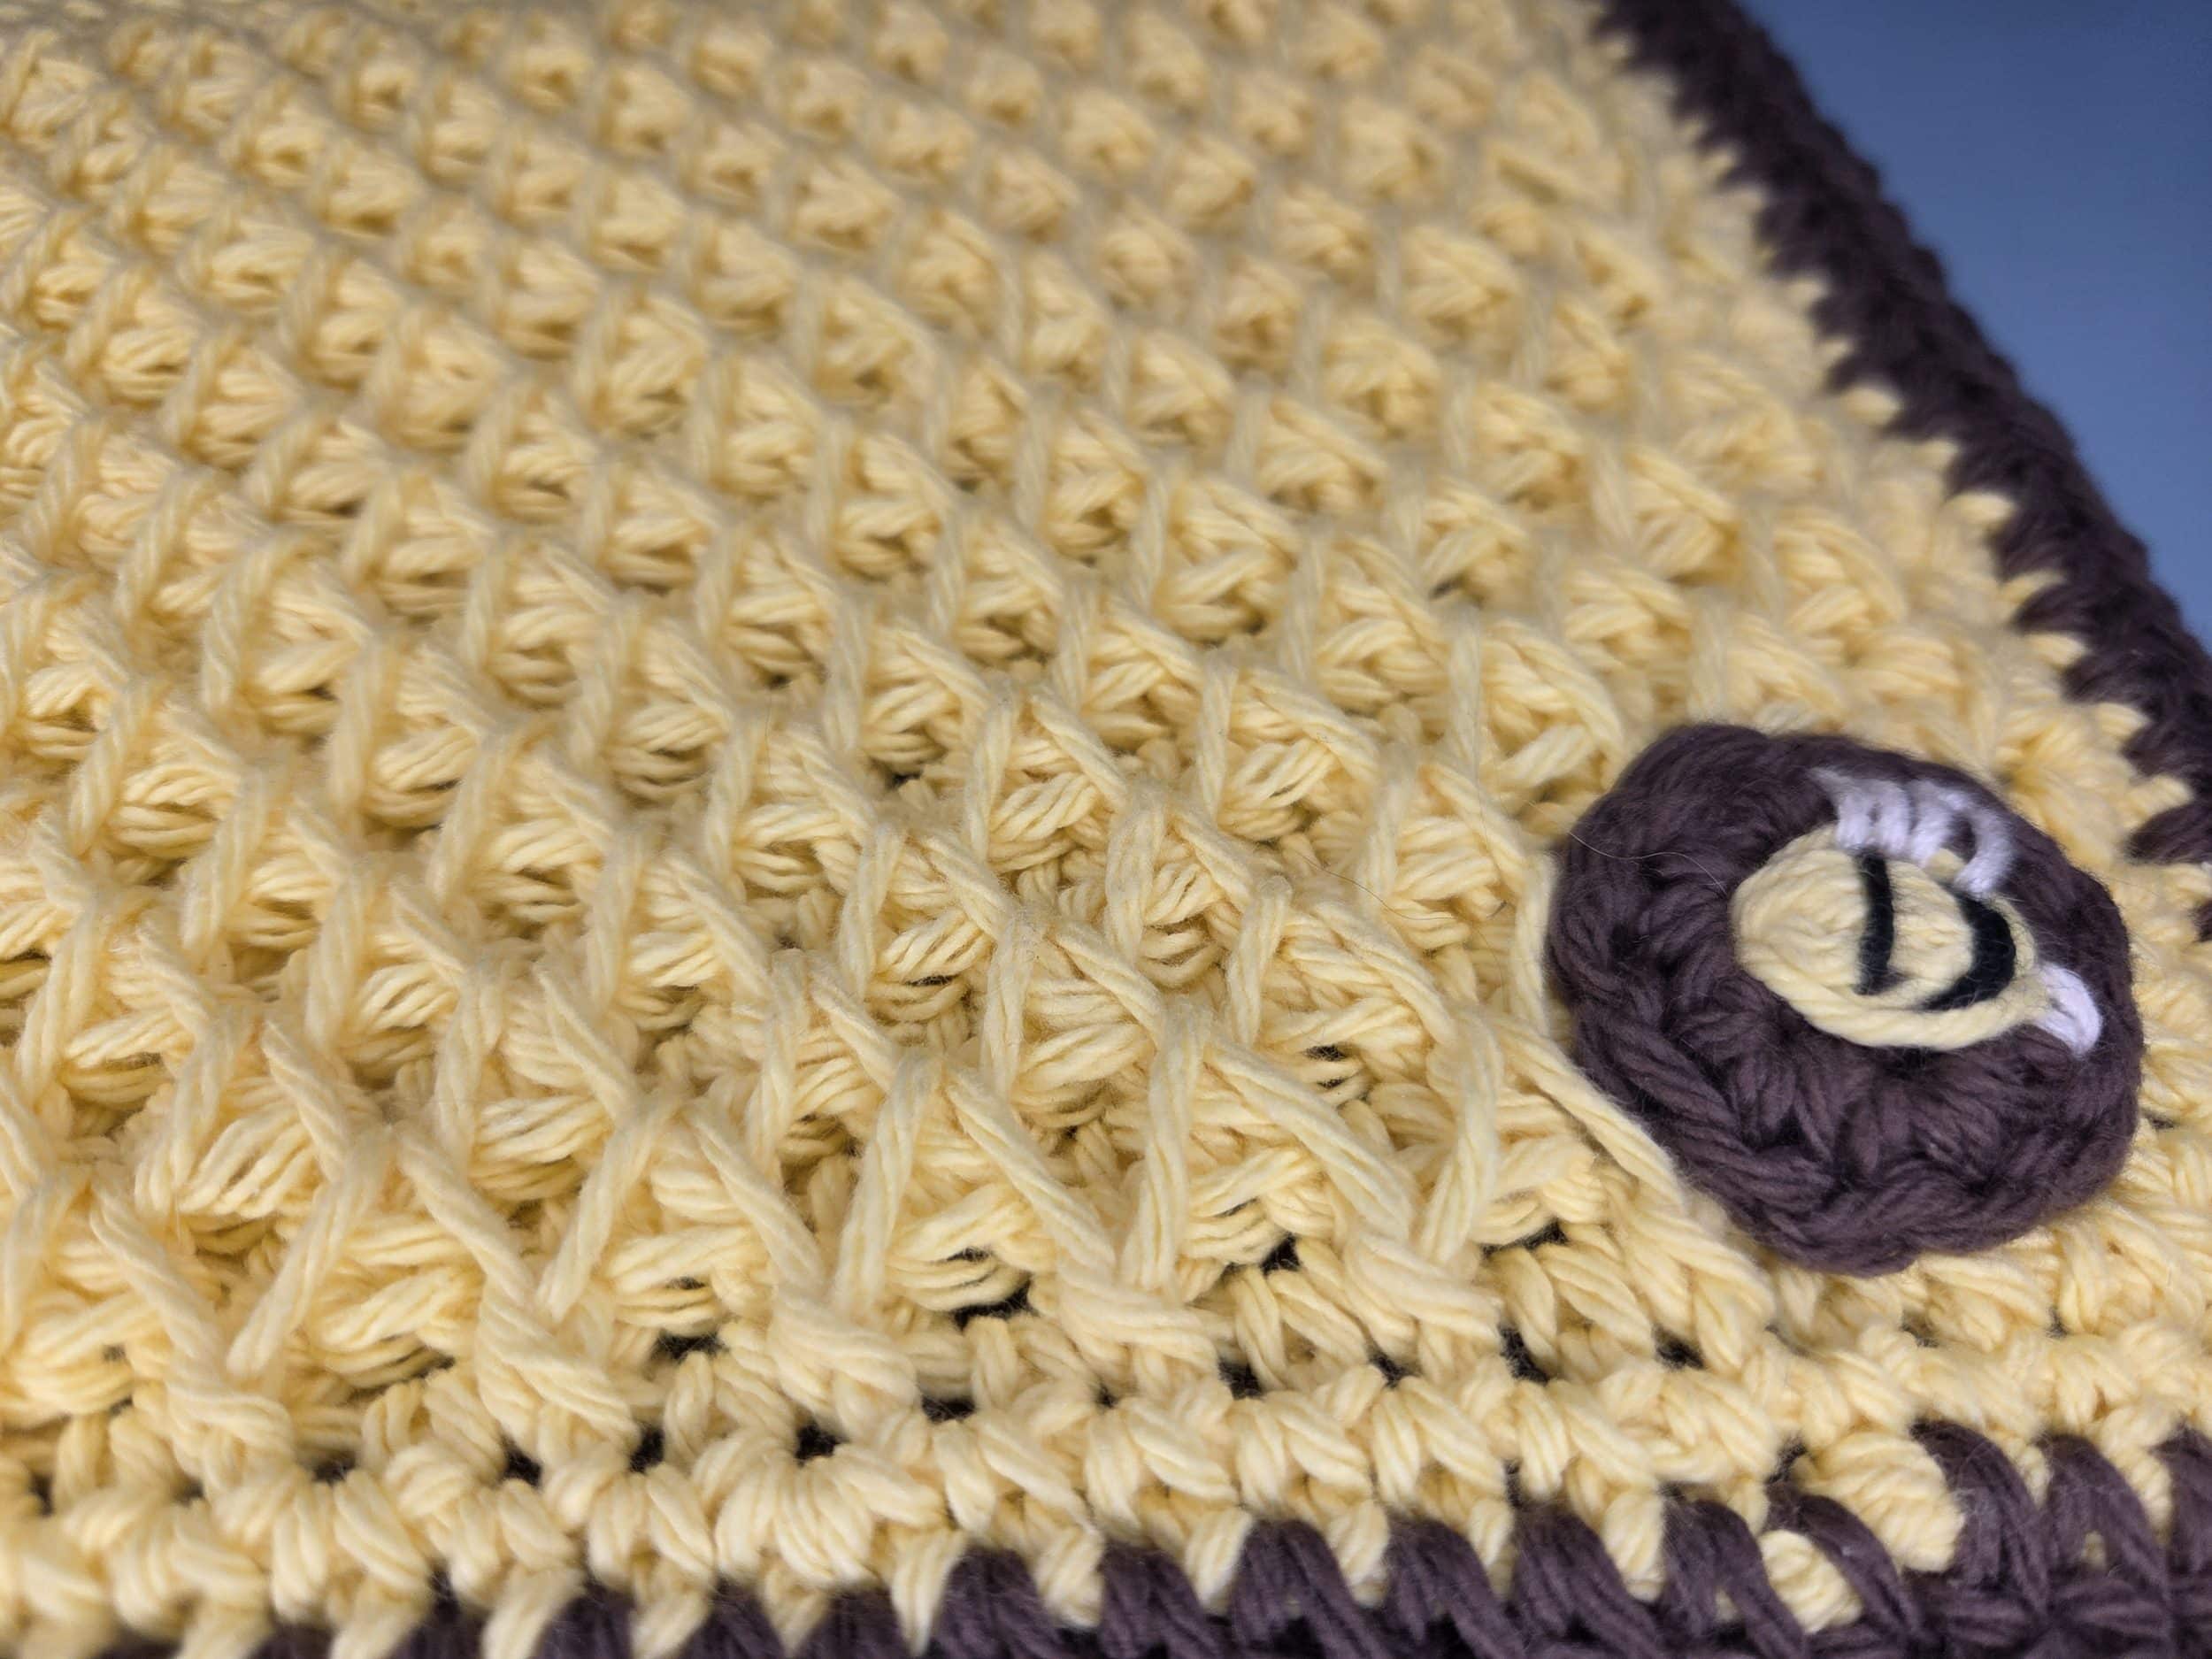
Ch 1 (does not count). 1 sc. 1 spike sc (insert hook 2 rows down, pulling up to the height of the current row). Sk 1 sc. Repeat 1 sc and 1 spike sc until one stitch remains. 1 sc. Turn. [19 st]
Row 3:
Ch 1 (does not count). 1 sc in next 2 st. 1 modified sc (using the legs created from the spike sc, pull the last leg of the 1st spike and the 1st leg of the 2nd spike together, complete like a sc). Repeat 1 sc and 1 modified sc until 2 st remain. 1 sc in each of the last 2 st. Turn. [19 st]
Row 4:
Ch 1 (does not count). (1 spike sc, sk 1, 1 sc) repeat until 1 st remains. 1 spike sc in last st. Turn. [19 st]
Row 5:
Ch 1 (does not count). 1 sc. (1 modified sc, 1 sc) repeat to end. Turn. [19 st]
Row 6- 31:
Repeat rows 2 through 5 until row 31, or until the square measures approximately 5 inches. End with the right side facing up.
Picking Up Stitches on Edge:
Still using yarn A, with the right side (honeycomb textured side) facing up.
Step 1:
Ch 1 (does not count). Working along the side of the piece, pick up and sc 19 stitches evenly.
Step 2:
Once you reach the bottom foundation chain row, work (2 sc, ch 2, 2 sc) into the 1st ch st for the corner. Then work 1 sc in the next 17 st.
Step 3:
Work the next corner (2 sc, ch 2, 2 sc) into the last ch st. Then pick up and sc 19 stitches evenly up the remaining side.
Step 4:
Pivot to work across the last row of the base. Work (2 sc, ch 2, 2 sc) into the 1st st for the corner. Then 1 sc in the next 17 st.
Step 5:
Complete the final corner with (2 sc, ch 2, 2 sc) and sl st into the 1st picked up stitch along the side.
Fasten off. Weave in ends.
Sensory Grounding
When working on the border, work outside. Save it for a nice day, or a covered spot in the rain. Enjoy the weather that helps life grow.
Name 5 things you don’t notice enough. The breeze, the smell, the birds. Take it in, say thank you.
Brown Border
This border is worked with hdc (half double crochet)
Step 1:
Attach yarn B in the last corner space worked. Work (1 hdc, ch 2, and 2 hdc).
This will be your 1st corner, though it will be completed at the end with the 1 missing hdc
Step 2:
Work 1 hdc into the next 21 st
Step 3:
Work 2 hdc, ch 2, and 2 hdc into corner space (2nd corner done)
Step 4:
Work 1 hdc into the next 19 st
Step 5:
Work 2 hdc, ch 2, and 2 hdc into corner space (3rd corner done)
Step 6:
Work 1 hdc into the next 21 st
Step 7:
Work 2 hdc, ch 2, and 2 hdc into corner space (4th corner done)
Step 8:
Work 1 hdc into the next 19 st. Then 1 hdc into the 1st corner space to complete the round. Join with a sl st or invisible join.
Fasten off. Weave in ends.
Circle for Bee Embroidery:
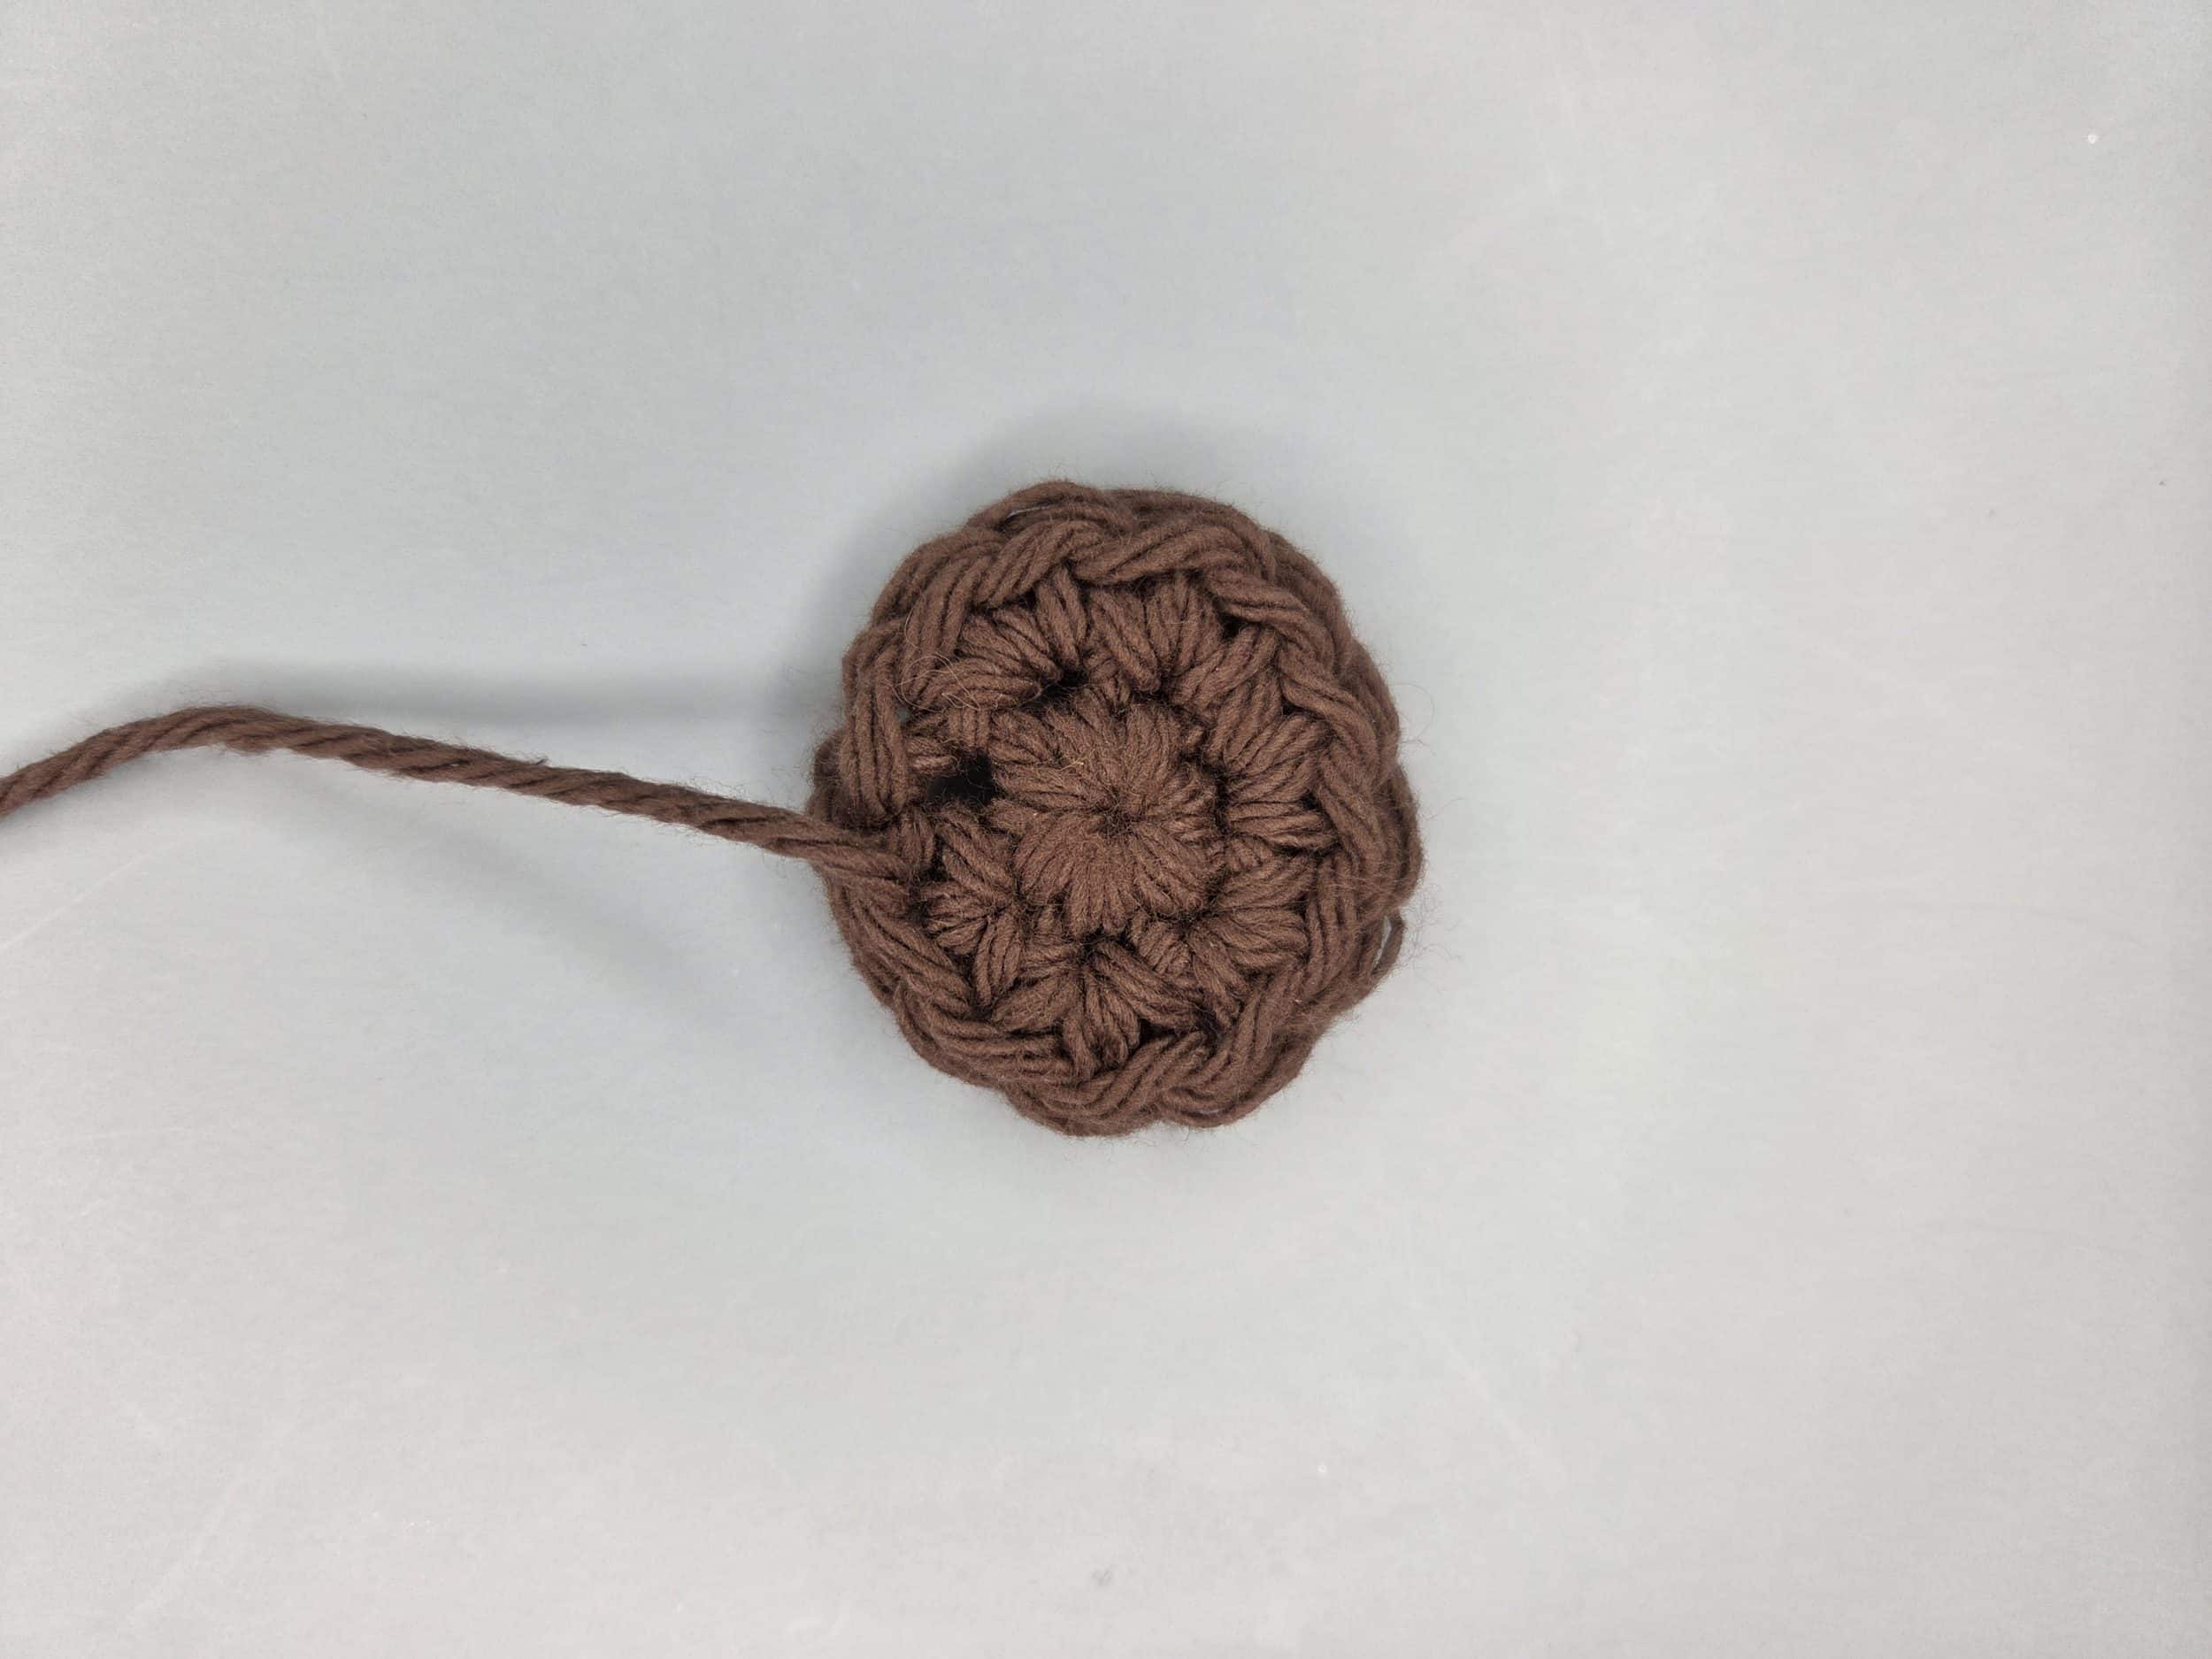
Foundation:
Magic Ring
Round 1:
6 sc into ring [6 sc]
Round 2:
2 sc in each stitch. Join. [12 sc]
Fasten off, leaving a long tail for sewing to the pot holder. Weave in the starting tail.
Embroidered Bee:
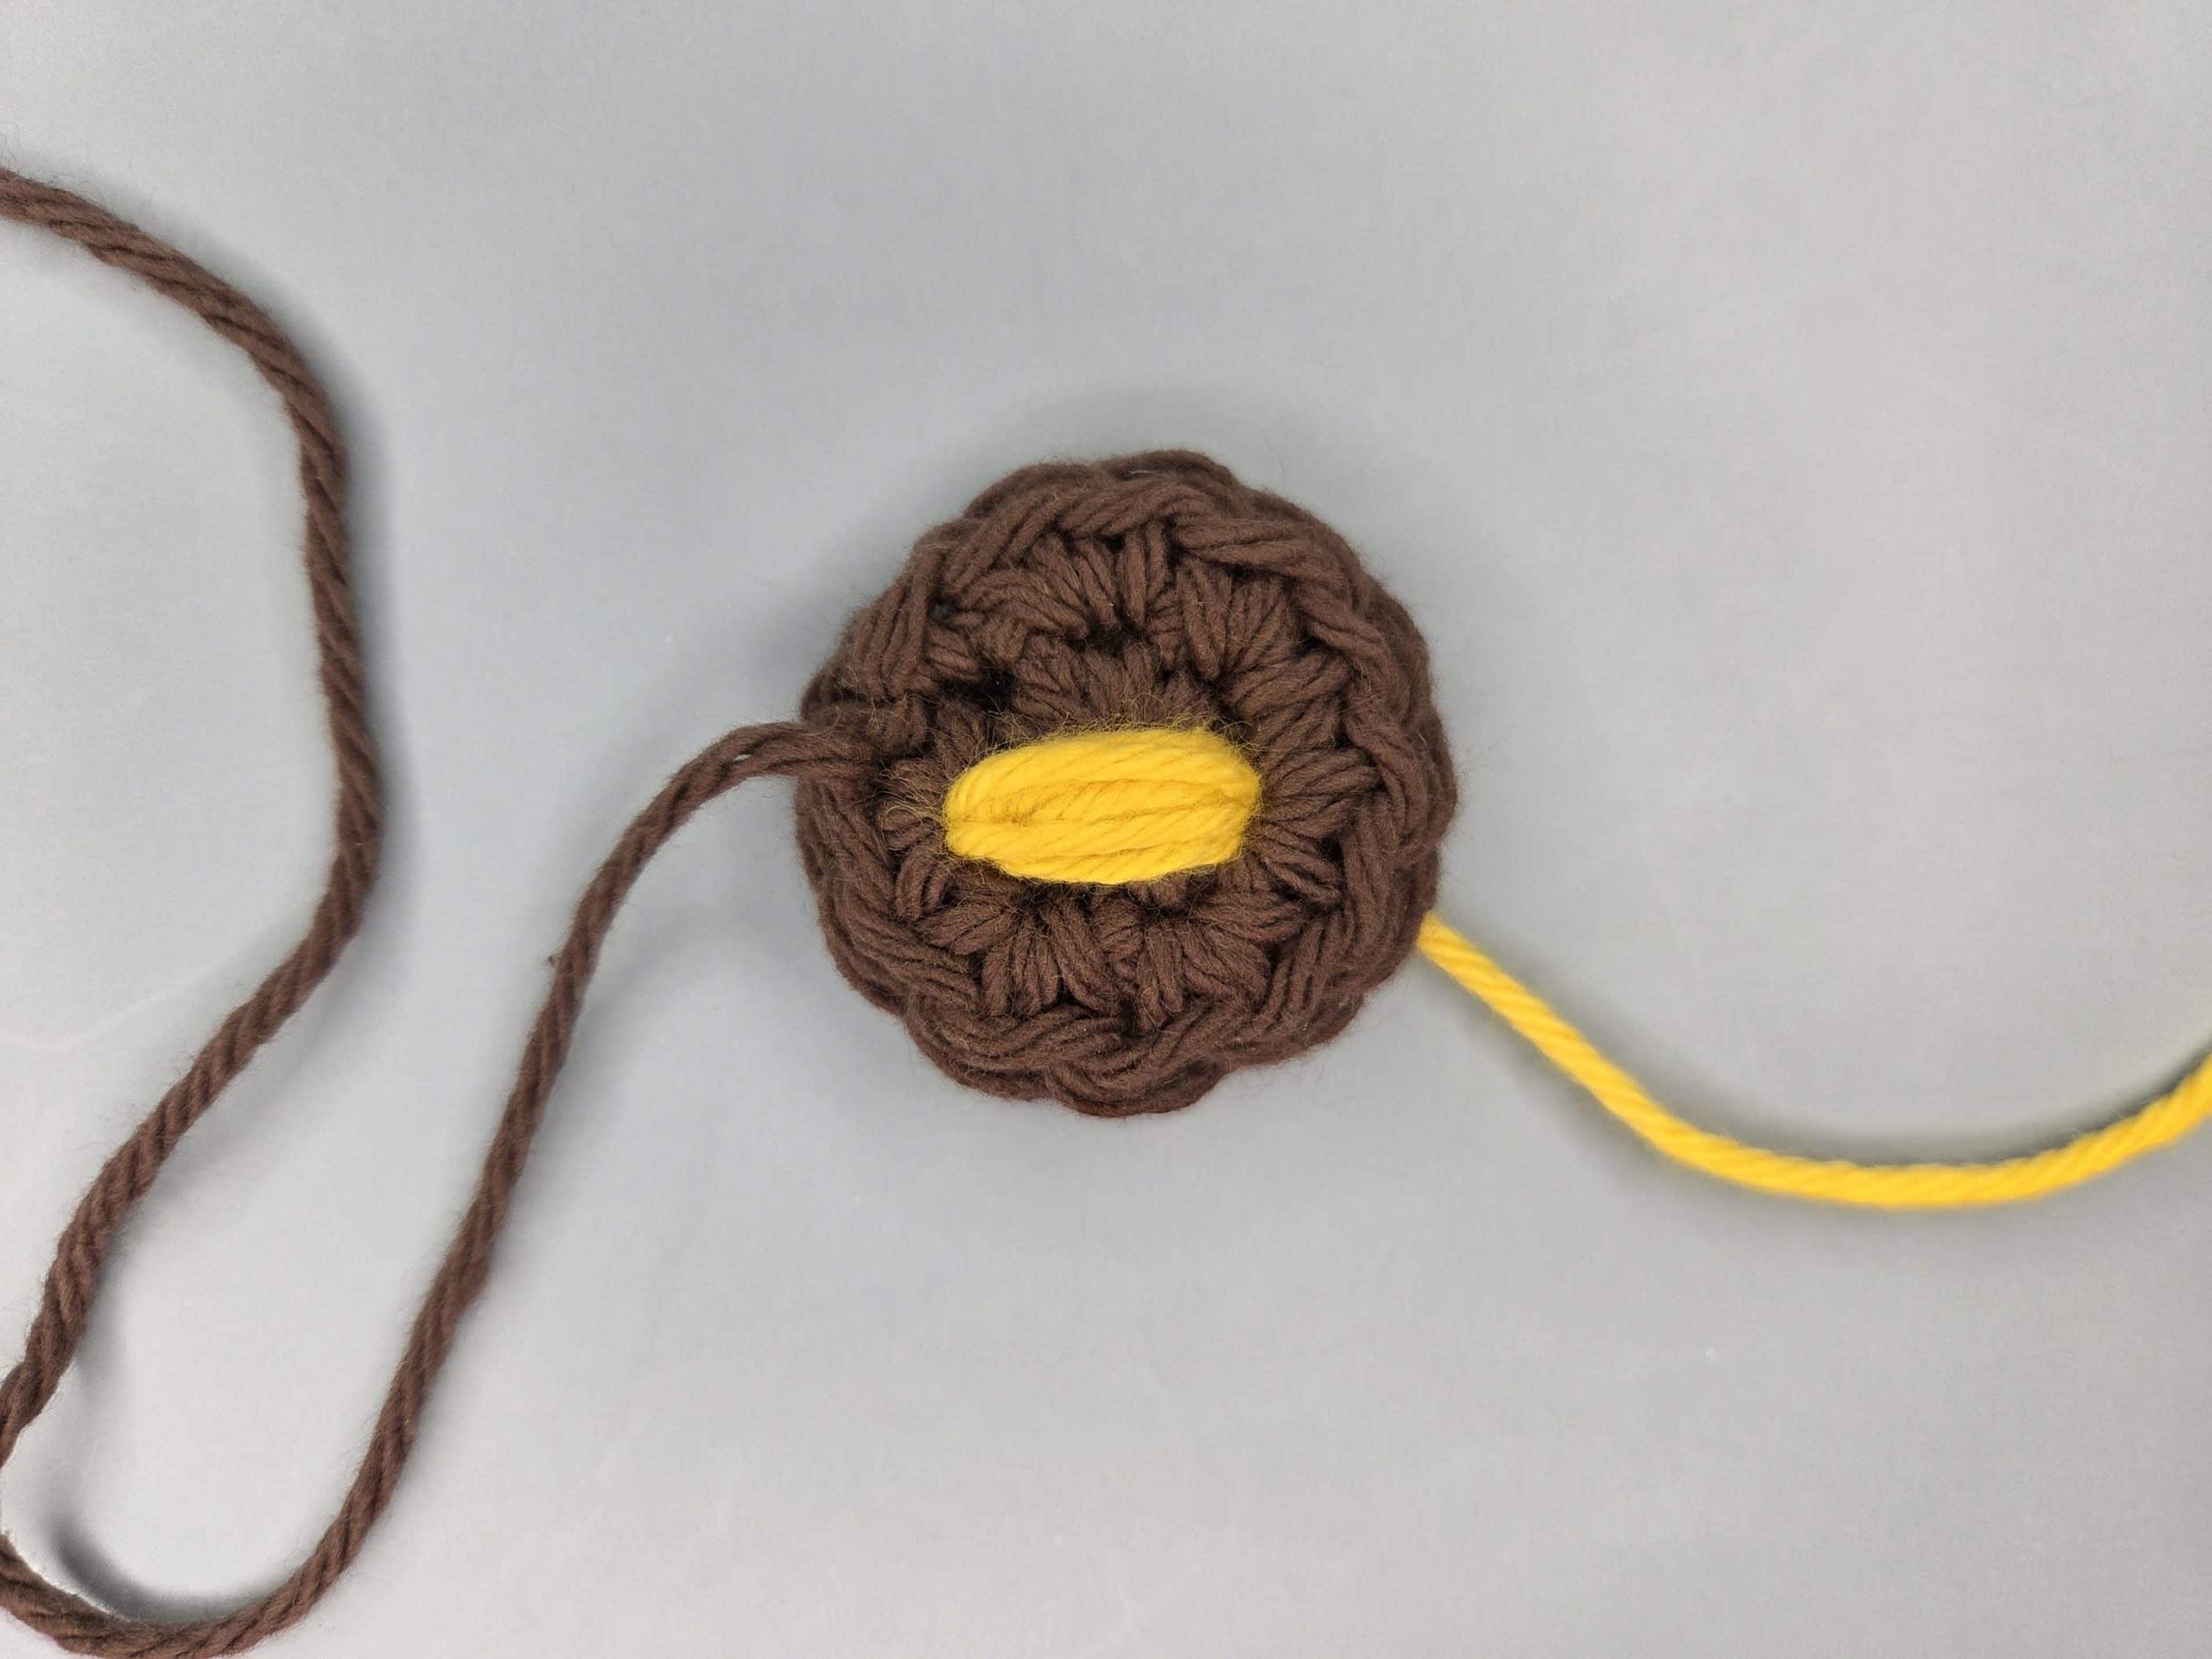
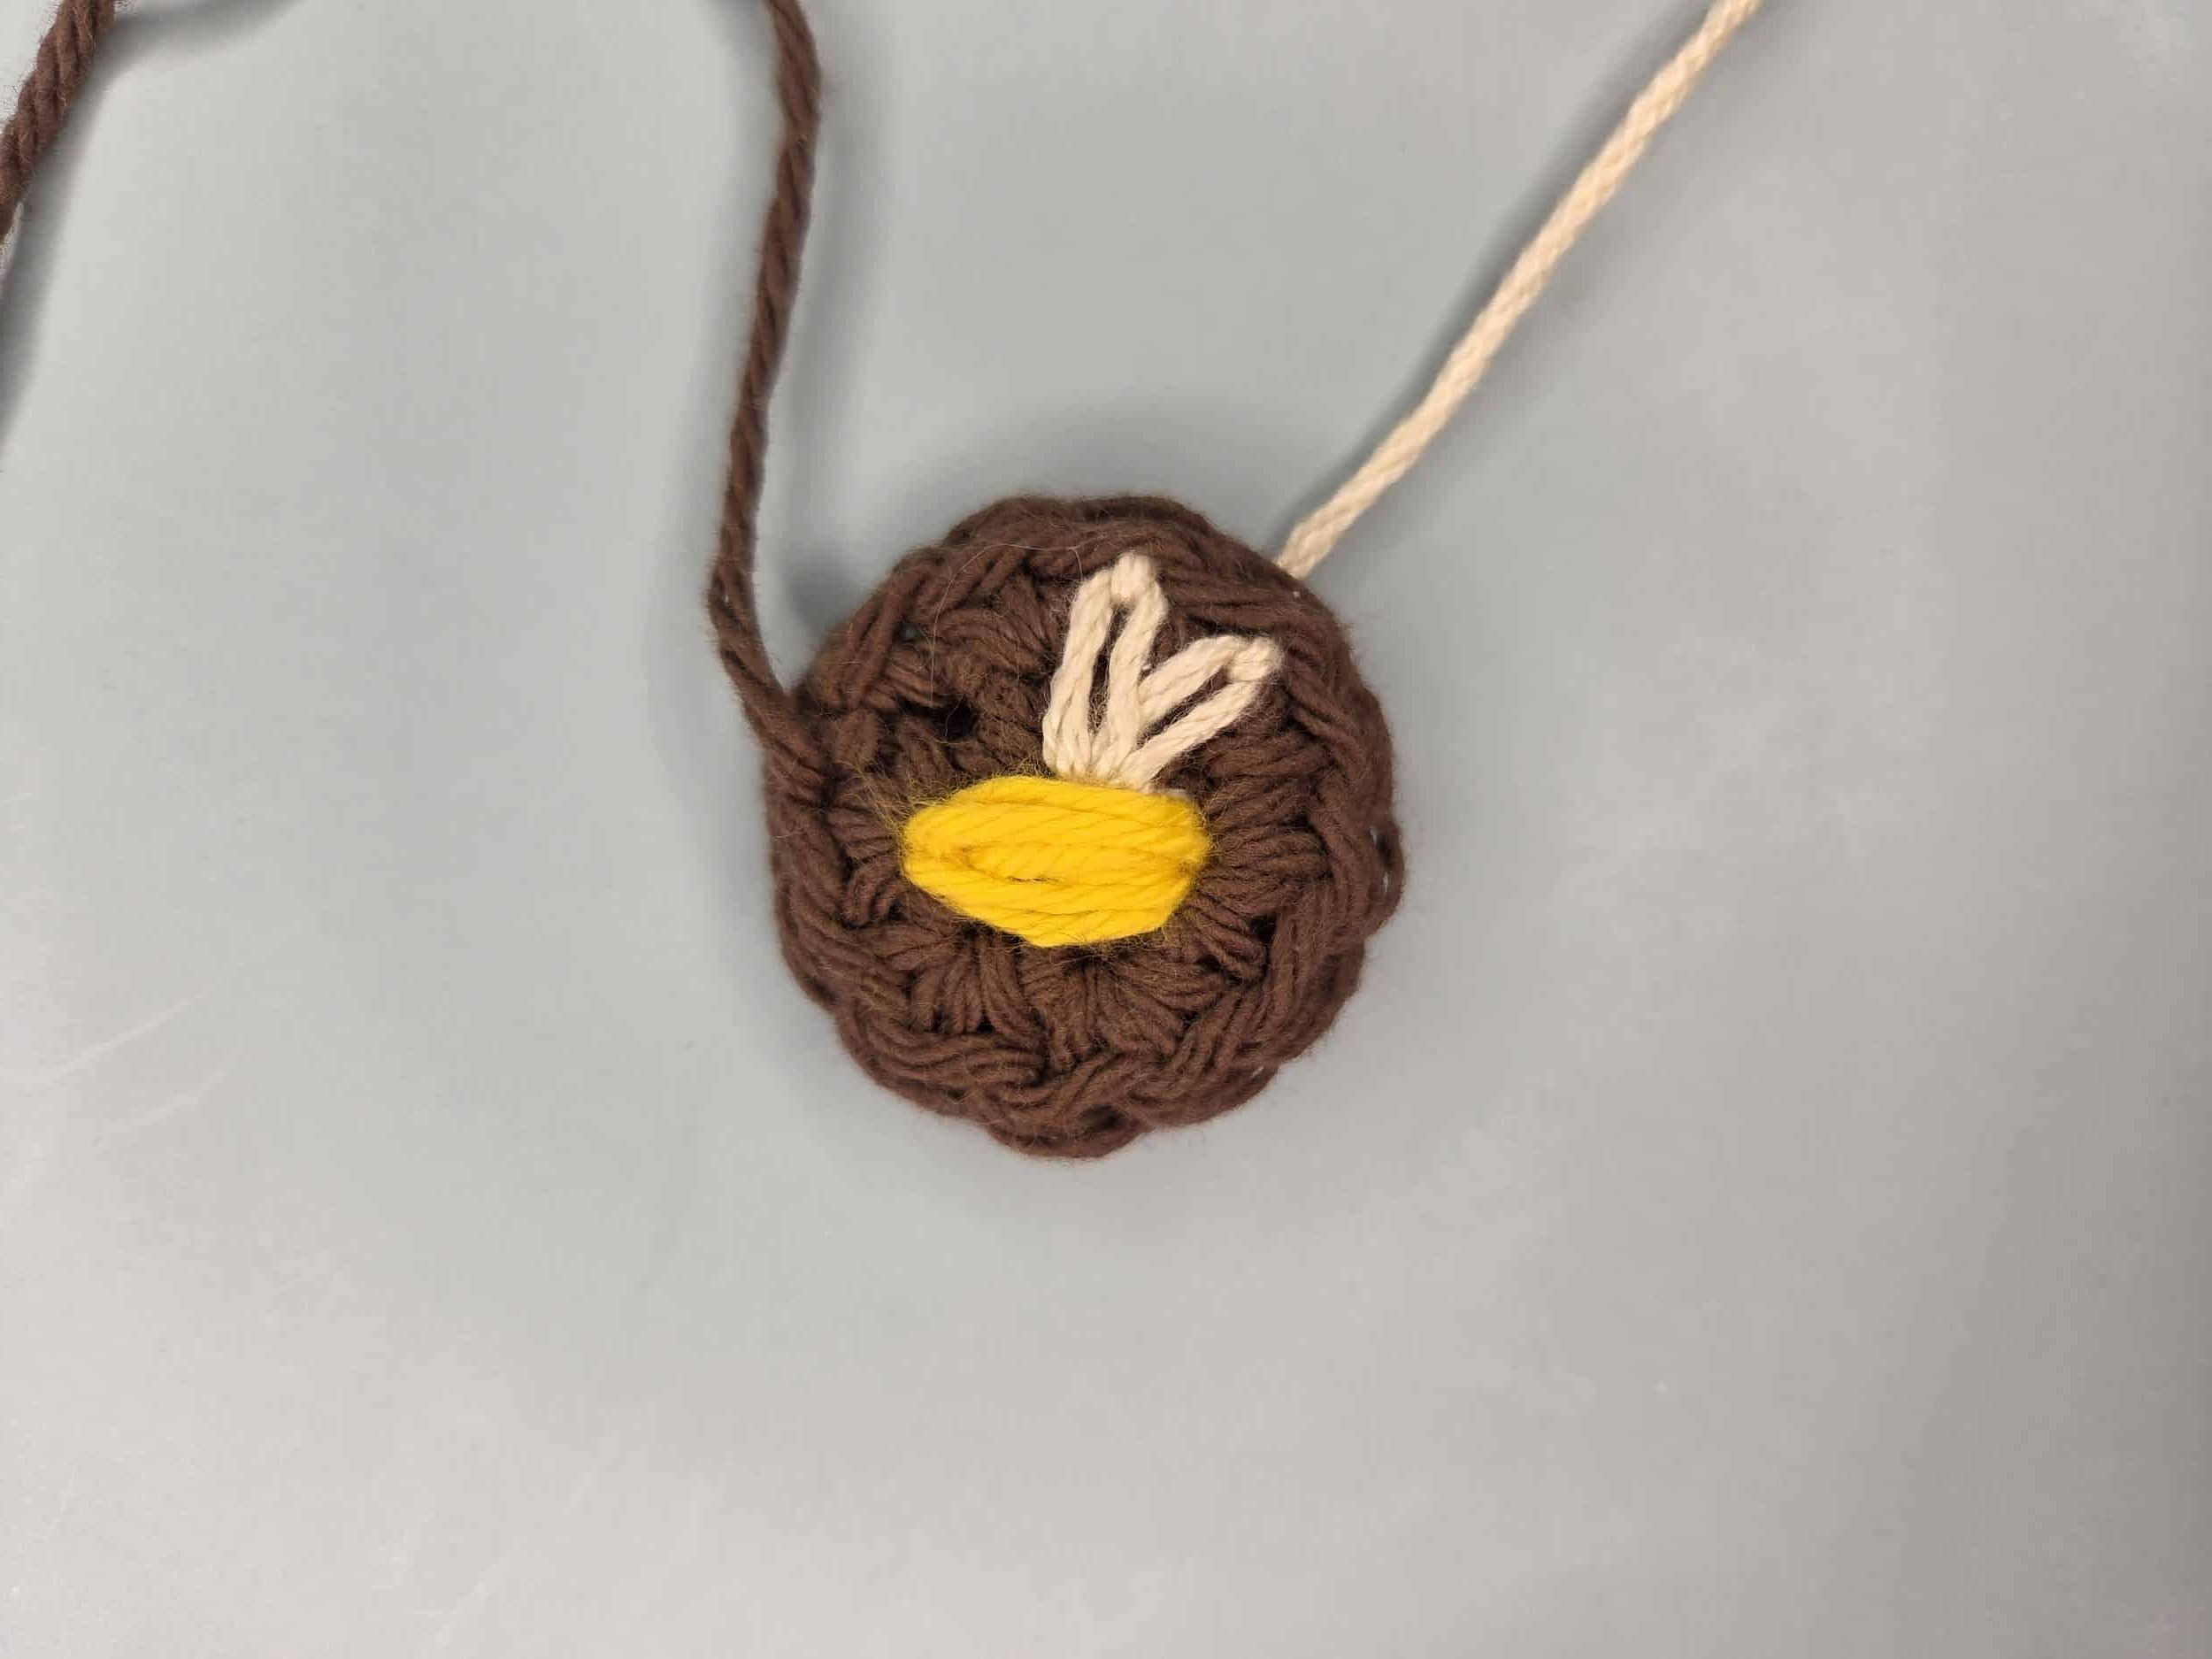
Using yellow yarn, knot on the wrong side of the circle. Bring your needle up through one of the stitches from round 1 on the left side of the circle. Work horizontal straight stitches across the circle, anchoring each stitch into the round 1 stitches on either side. Work as many stitches as needed until the body is the thickness and size you prefer. Knot off on the wrong side.
See image below
Using white yarn, knot on the wrong side of the circle. Bring your needle up through the magic ring hole. Insert your needle back down right next to the magic ring, leaving a loose loop on the surface. With the loop still loose, bring your needle up from the back of the circle through a stitch from round 2 directly above, passing through the loose loop to anchor it. Pull gently to shape the wing. Repeat for the second wing, working into the same magic ring hole and anchoring into the stitch from round 2 next to the first wing.
This stitch is known in embroidery as a lazy daisy stitch or detached chain stitch. If you need a visual reference, either term is easy to search.
See image below
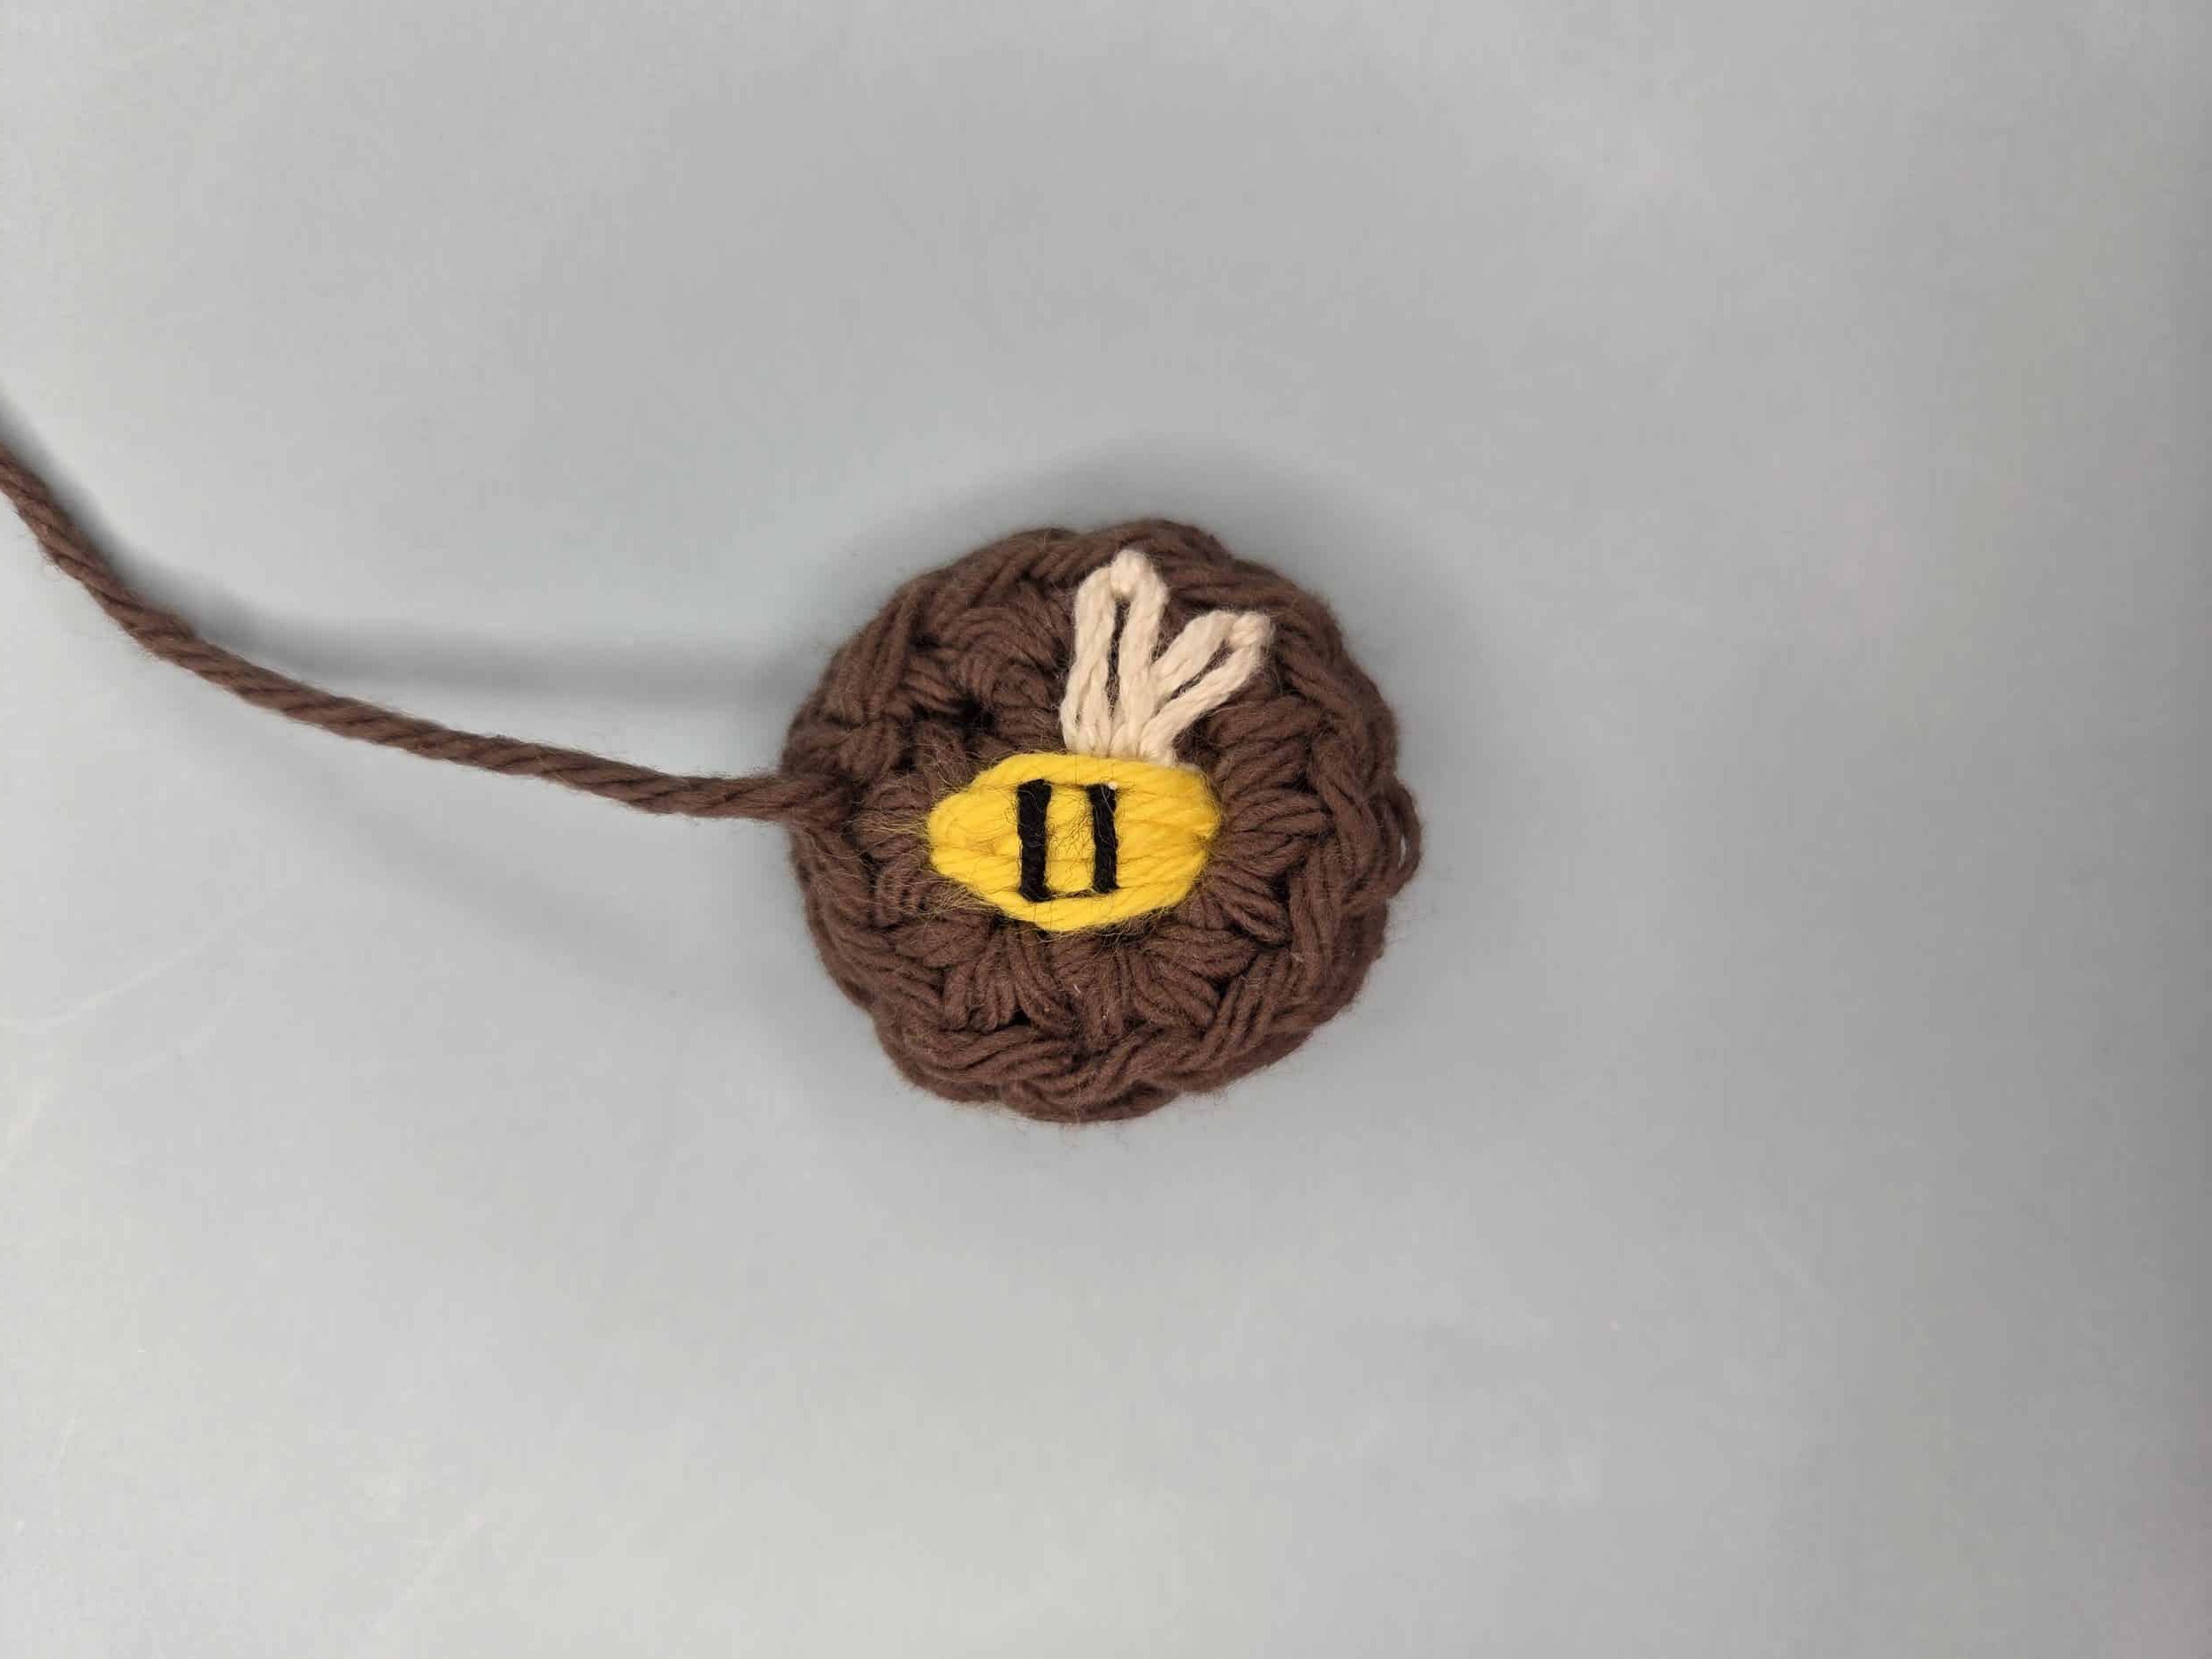
Using black yarn, knot on the wrong side of the circle. Working vertically across the horizontal yellow body, insert your needle through one side of the body and out the other, leaving a visible black stripe on the surface. Work as many black vertical lines as your little bee needs. Knot off on the wrong side.
See the image below for the finished look.
Note: Attach the completed bee circle to the right side of the honeycomb square before joining the sc back. This will hide all knots on the wrong side.
Single Crochet Back Square
Foundation:
Ch 25 [24 st, 1 turning ch st]
Row 1:
In the 2nd loop from the hook, work 1 sc. Continue working 1 sc in each stitch. [24 sc]
Row 2-23:
Ch 1 (doesn’t count). Work 1 sc in each stitch. Turn
Row 24:
Ch 1 (doesn’t count). Work 1 sc in each stitch. Fasten off, leaving a big enough tail to sew together the front honeycomb square and the single crochet back square.Note: The edges of the sc back square are intentionally left unfinished as they will be hidden inside when joined. The honeycomb front and sc back may not have identical stitch counts on each side due to the nature of the smock stitch edge versus a standard sc edge. This is normal. Pin both squares together before stitching and distribute your whip stitches evenly across each side rather than working one stitch per stitch.
Final Touches
Before joining the front and the back squares, embroider and attach your bee to the honeycomb side.
Place both squares wrong sides together. Using yarn B and a tapestry needle, whip stitch around all four sides, catching the back loop of the honeycomb border and the edge of the sc back square. Fasten off and weave in all ends.
Block as needed, and don’t forget to share what you made. I’d love to see it. As always, thank you for creating something beautiful with me.
Thank You
Thank you for spending a little bit of your day checking out this bee hot pad pattern and hanging out on my site. Having you here and making these patterns is honestly what keeps this whole space growing.
If you made one of these honeycomb hot pads, I hope the repetitive stitches brought a little bit of quiet calm to your hands. If you’re looking for what to stitch next, you could make a full kitchen set with this easy half double crochet hand towel, or if you want something a little more silly with its tongue sticking out, check out the frog coaster pattern. My free pattern library is always growing.
And if you want to follow along with my latest projects, quiet crafting moments, or whatever random yarn idea I’m trying out next, come say hi on Instagram, YouTube, TikTok, or Pinterest.
Stitch slow, breathe deep, and stay mindful!
Please do not copy, repost, or distribute this pattern as your own. You are welcome to sell finished items made from this pattern, but please credit Yarnful Mind as the designer. Thank you for supporting my work and honoring creative boundaries.